
How to buy SeekaHost VPS hosting with Free CyberPanel

By Arshath | October 21, 2022
Free CyberPanel – You need hosting where you have a separate server with SSH access and complete control over it. But wait, how about the control panel that you are going to use as an interface to manage the website and other resource allocation with management features?
You will still search for a solution that goes deep and deep into the sea which you can’t stop. So, what we have made things easier for you is we have Free CyberPanel, a control panel to manage things on the VPS server.
But instead of charging for the control panel provided to you, we want you to completely experience the world never before user-friendly than cPanel which a lot of people are in the moving phase.
What you have best of best in this package is that you can also get an offer. And also, no need to worry about the configuration setup which is the main and lengthy thing that drains your time and leaves you in a confused state
Get the complete information about Free CyberPanel with VPS Hosting through our official website page and clear doubts while in the air.
ALSO READ: How to install WordPress in Cyberpanel
CyberPanel VPS Hosting Purchase:
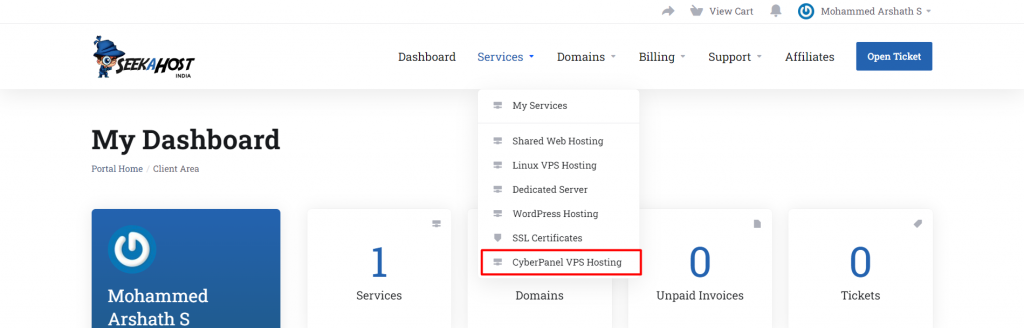
Guide 1: Log in to the client area if you are already a user or you can create an account while ordering the package.
Guide 2: Go to the “Service tab” on the top menu section and click “CyberPanel VPS Hosting”.
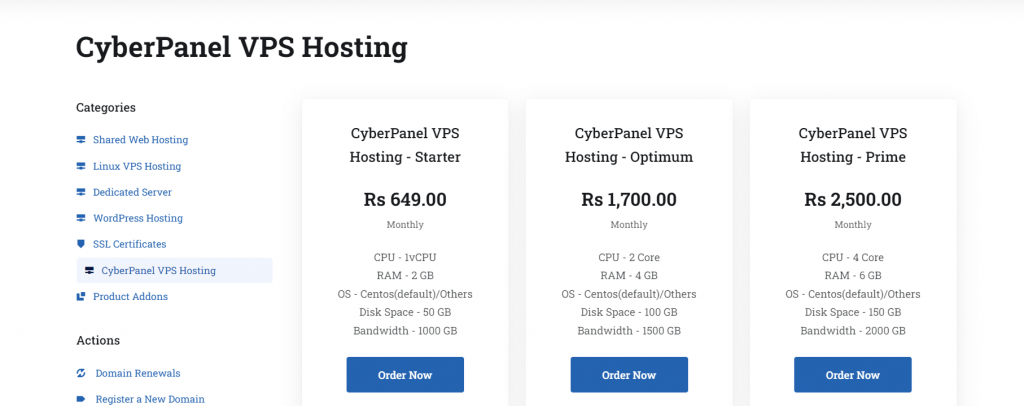
Guide 3: Choose the desired plan by checking the resources you need.
Guide 4: Choose the billing cycle and enter the hostname as the domain name or IP which you want. In Prefix boxes, enter ns1 and ns2. Then click “Continue”.

Guide 5: Under billing details, choose your existing account or choose “create a new account”.
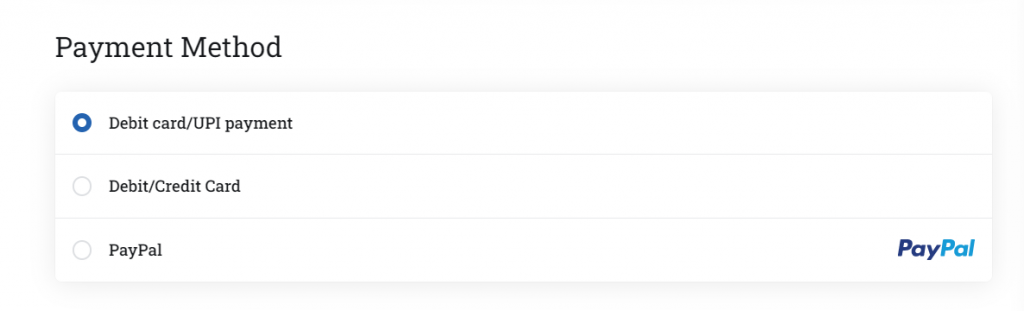
Choose the desired payment method and click the terms and condition check box and click “checkout”.

Once you have completed the payment, you will receive the “Order Confirmation” to the registered mail id with us.

Guide 6: Now, as we have set the automatic setup of CyberPanel to ease the process, you will receive two emails “VPS Account details” and “VPS and VNC Details” which will contain the complete credentials to access through.
Guide 7: To access the server, kindly point to A record on your domain registrar.
Guide 8: To access the Free CyberPanel, follow the below method:
URL: domainname:8090
If not pointed to the A record, access with the below method:
URL: mainip:8090
Guide 9: Enter the username “admin” and enter the password which you got on the mail under “cyber panel details”.

Great you have the server and start ruling the world. Hope you enjoy our service.