
How to install WordPress in Cyberpanel of SeekaHost VPS Hosting

By Arshath | October 17, 2022
The article provides a step-by-step guide on how to install wordpress in cyberpanel with SeekaHost VPS Hosting, meanwhile creating a user, website, and package.
WordPress:
WordPress is the simple and most popular content management system in the current digital world. With the control panel around the number of panels. WordPress will be different in the installation process but it doesn’t require you to study or understand the process separately.
About Cyberpanel:
Install WordPress in Cyberpanel along with LS Cache which is the same as how you install WordPress through softaculous which is pretty much easy to do. You can config several web applications such as WordPress, Magento, and Prestashop.
Some good features are managing users, databases, email, FTP, backups, DNS, automatically issuing SSL certificates with Let’s Encrypt, integration with Cloud Flare, Docker management, and more.
You can just order cyberpanel VPS hosting, where the CyberPanel will be automatically installed on the VPS Server. Once you completed the purchase, follow the tutorial to know about how to install WordPress in Cyberpanel, the next-generation web hosting control panel.
Install WordPress in Cyberpanel:
(Before going through this process, make sure you have the domain and nameserver updated in the registrar after hosted in the server)
Process 1: Log in to VPS Server configured with Cyberpanel.
Process 2: Create a new User and enter the required details and assign the role (ACL)
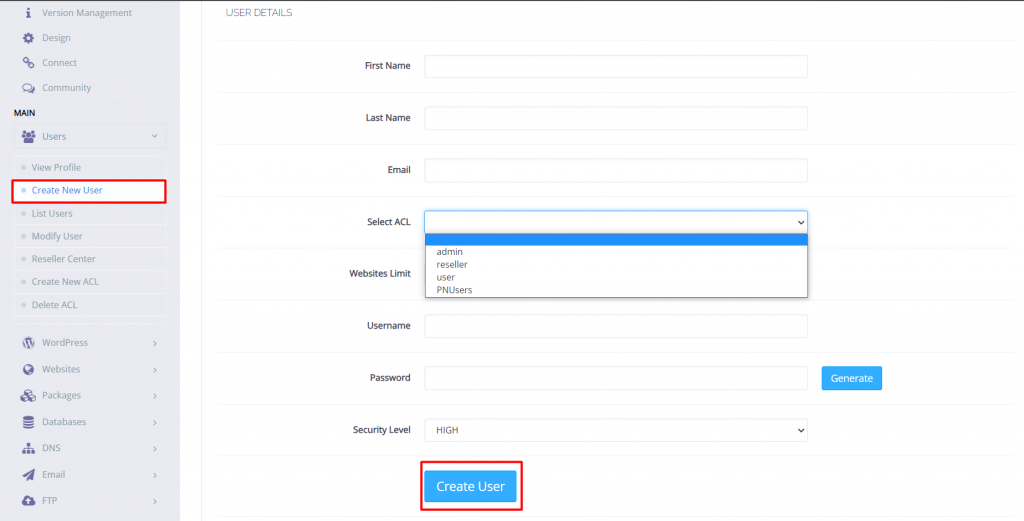
Here in the website limit mention the number of websites that can be hosted under the user.
You will receive the WordPress notifications to the mentioned mail id only.
Process 3: Once created the user, you now have to create the website to install WordPress. Click “Create website” and enter the required details.

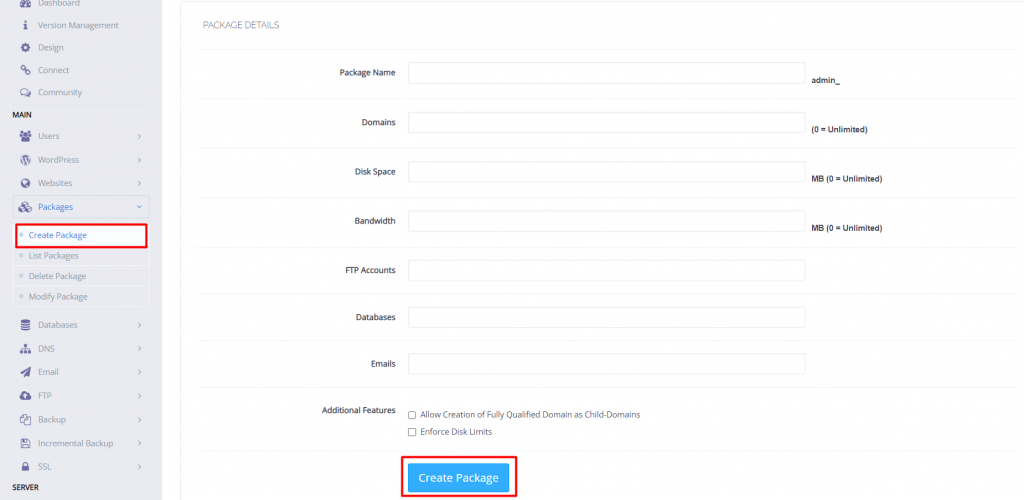
NOTE: You have to create a package that has been allocated with resources to assign to the user.
Process 4: Go to Websites and click “List Websites” and then click “Manage” which is on the top right of the website list.

Process 5: Instead of softaculous, you will have “WP + LSCache” under the application installer. Scroll down the page and click it.
Process 6: You will be asked to enter the WordPress installation details. Once entered, click “Install now”. You can mention any name in the “path box” to store the installation details under that folder. If not leave it empty.
You can also add additional features if the need for the website.

You have now successfully installed WordPress.
Process 7: Go to the WordPress option and click “List WordPress”. Now click “Scan WordPress” to check for the installed WordPress.

Now you can log in to WordPress from the cyber panel. Launch the Server with WordPress and enjoy the features of SeekaHost hosting.