How to Create an eCommerce Website with WordPress?

By Arshath | June 22, 2026
Selling products online and multiply the profit with increasing the brand value is prominent goal of any online business company through ecommerce platform. Do you wonder how to create an ecommerce website?
There are many CMS platform where you can build the online store to make your dream come true. One of the most suitable and easily setup CMS is WordPress.
Let’s help you discover all the information you need to create an ecommerce website with WordPress and make a successful online business.
What is WordPress?
WordPress is a CMS software used to build website using plugin and themes customizing the content according to your needs. You can build any type of website content using WordPress which is very easy to build and live the content with few clicks.
What is an Ecommerce Website?
An e-commerce website (aka electronic commerce) is an online platform used to buy and sell products digitally through an online store without visiting a physical store.
You can Create an Ecommerce Website covering the important features such as add products, setup billing with different currency, apply tax and discounts, etc with your online store so your customers can purchase your products digitally without visiting your store physically.
Prerequisites:
1. Registered Domain Name for your business.
2. Secure and Reliable Woocommerce Web Hosting Service
3. Connect Domain and Hosting to live the content.
4. Install WordPress and WooCommerce plugin from WordPress Dashboard and Activate it.
5. Run WooCommerce Setup Wizard and adjust the settings.
6. Configure payments (Stripe/PayPal), shipping zones, and taxes.
7. Add products: images, descriptions, prices, orders, variations.
8. Install theme compatible with WooCommerce.
9. Enhance your store with addon plugins to support your store.
10. Optional: Add plugins for caching (WP Rocket), SEO (Yoast), security for better optimization.
YouTube References:
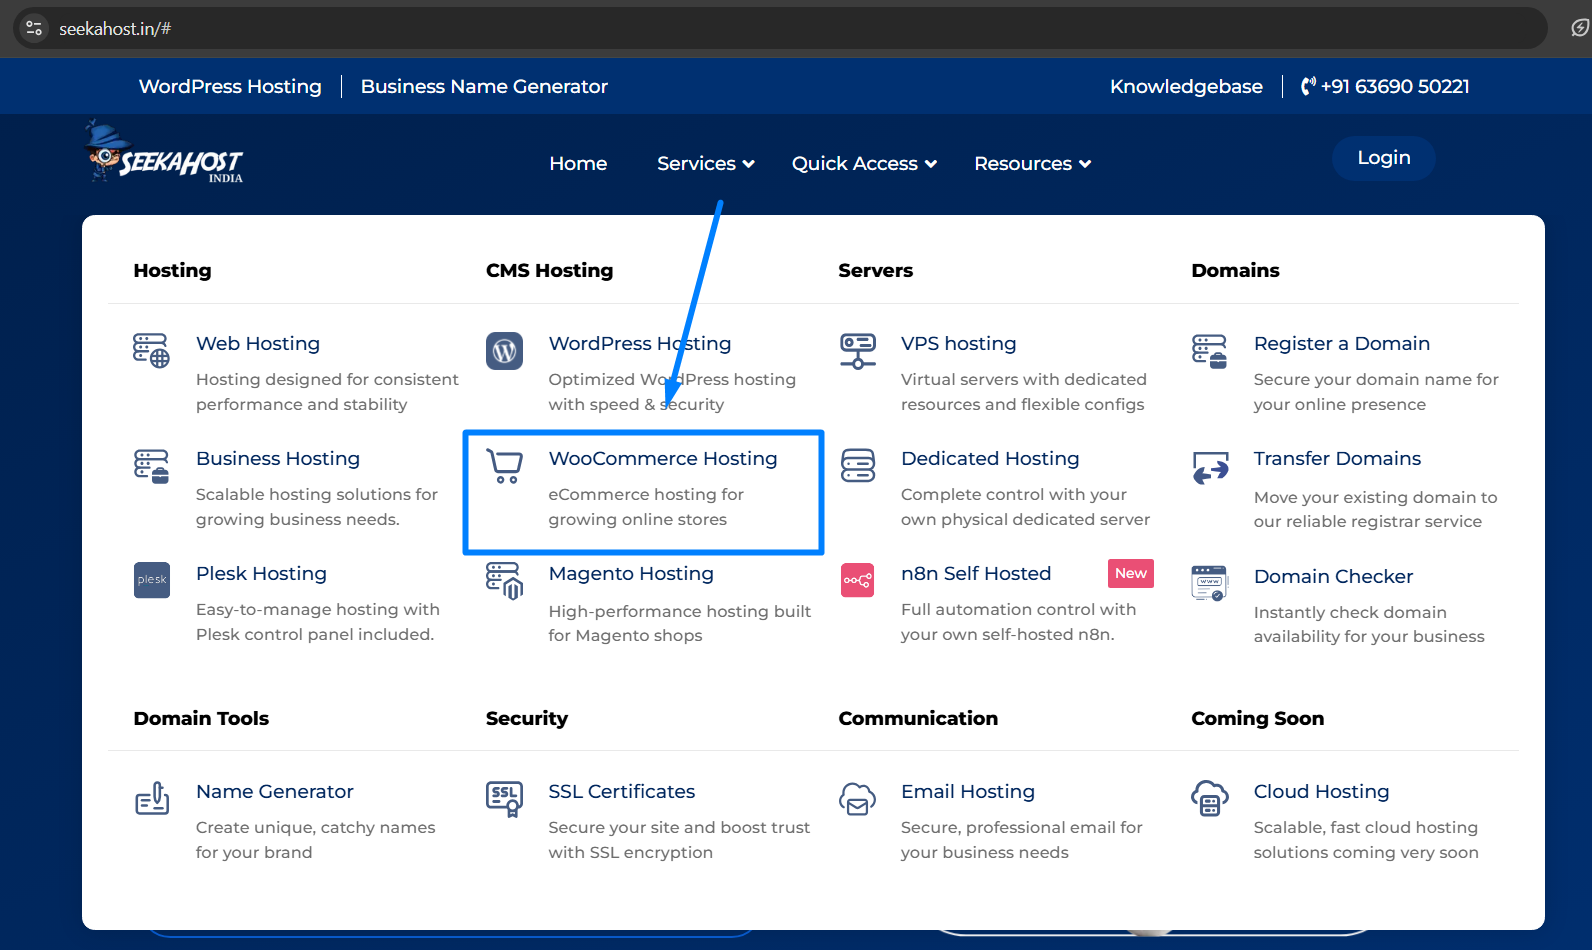
2. Purchase WooCommerce Hosting
Create an Ecommerce Website – Requirements:
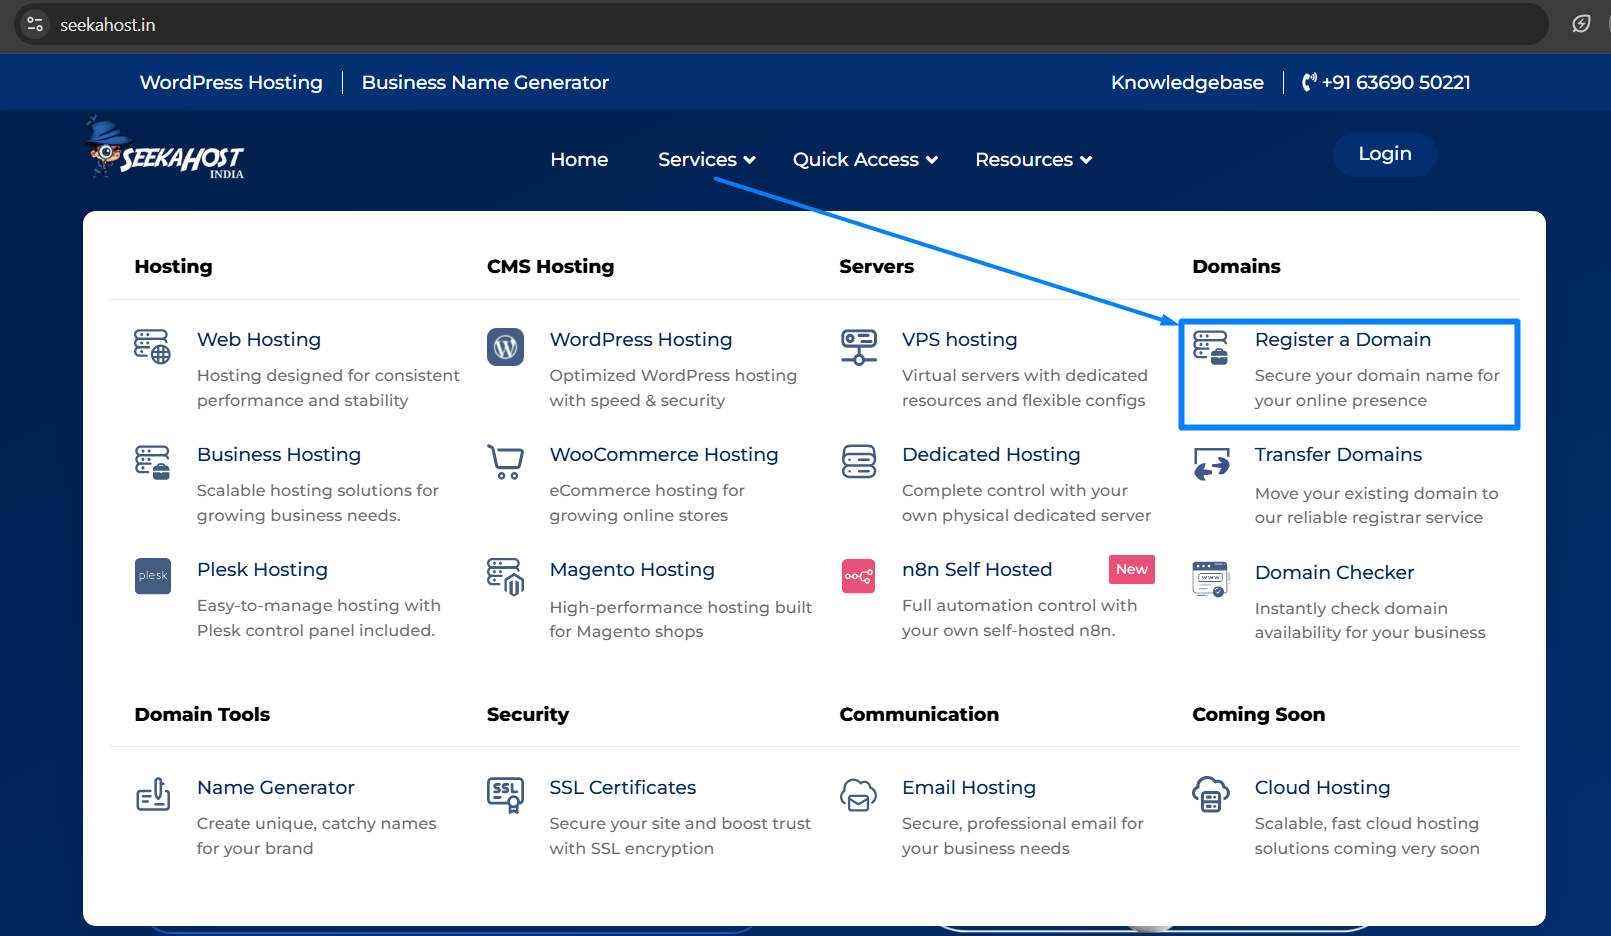
Follow the below steps by loading the website – SeekaHost.in in your browser to access the respective pages.
1. Registered Domain Name:
Having a domain name for your business or company is most crucial part of securing your digital presence taking over from physical store. Make sure you register your domain name related or suitable to your niche so it resonate well with your audience and business to easily catchup when you live the content.
2. Purchase a Web Hosting:
Next step after you secure your domain is to purchase a web hosting package from reliable web hosting provider. The reason is simple, you need a platform where you can manage the content data, store and live the content from that server to Create an Ecommerce Website. If there is no hosting, having only domain will only help you secure a name for your business but not the content.
3. Connect Domain with Hosting:
Once you secure both domain and hosting, its time to connect them together. You can purchase the domain and hosting with different providers but it would be easier for you to manage and get support when you purchase with one provider through single dashboard.
At SeekaHost, your website and domain will be automatically connected, installed SSL when you purchase them together with us.

Steps to Create an Ecommerce Website:
Here website name we will use as an example is woocommercewebsite.com. You can replace with your website name.
Step 1: Install WordPress
Once you purchase the WooCommerce hosting service with us, WordPress will be automatically installed. You will get the login details through email with WordPress details.
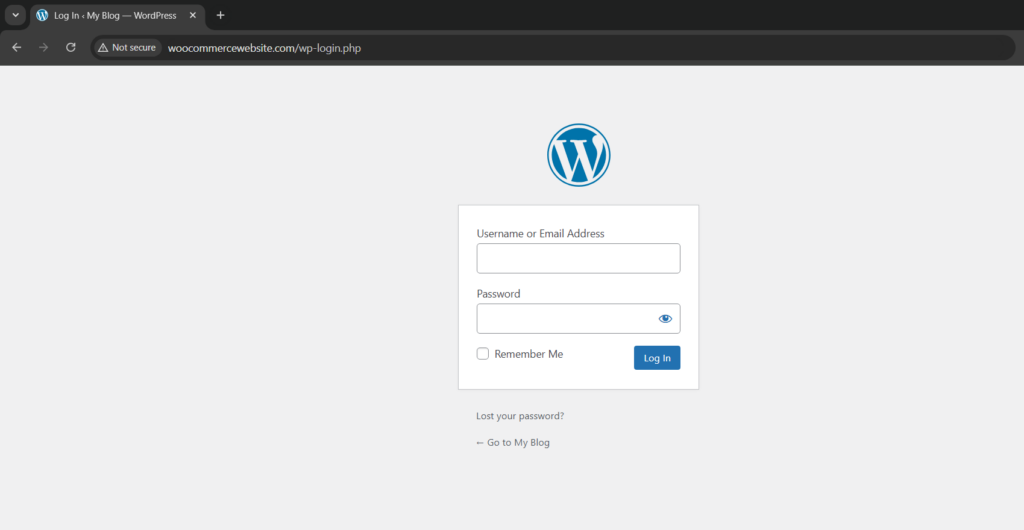
Step 2: Login to WordPress
Two ways to Login:
1. Login WordPress through cPanel
2. Login directly accessing WordPress url.
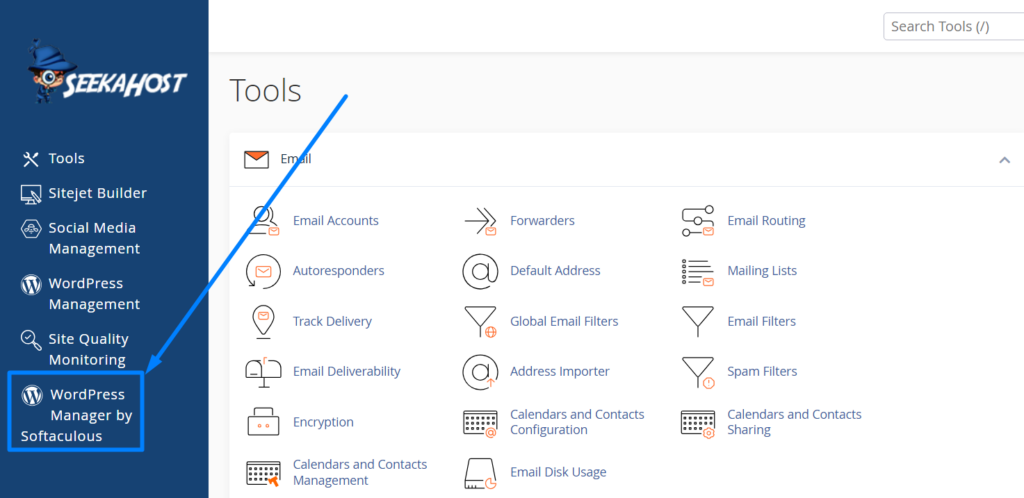
Login WordPress through cPanel:
- Load woocommercewebsite.com/cPanel or woocommercewebsite.com:2083 and enter your cPanel username, password to login.

- Click WordPress Manager by Softaculous option on left side and click login button to directly login to WordPress without requiring any login details.
Login directly accessing WordPress url:
- Load woocommercewebsite.com/wp-admin or woocommercewebsite.com/wp-login.php and enter your WordPress username, password to login.
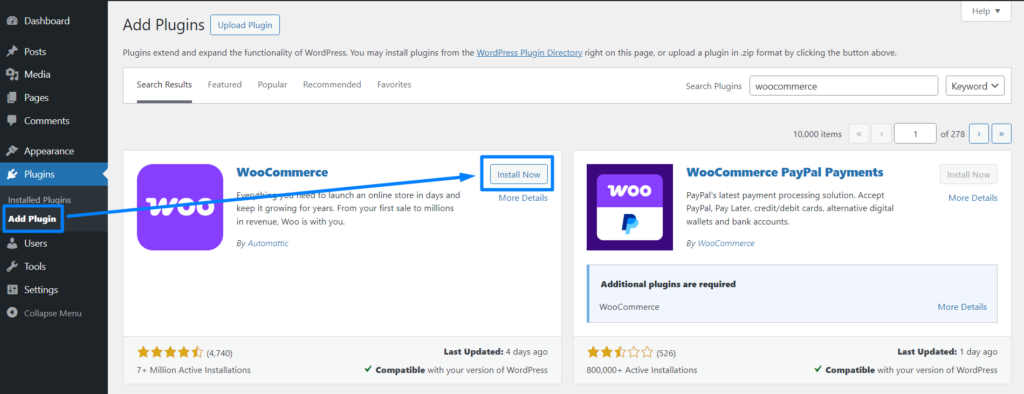
Step 3: Install WooCommerce Plugin
Click Add Plugin option -> search “WooCommerce” -> Click “Install Now” and Activate button.
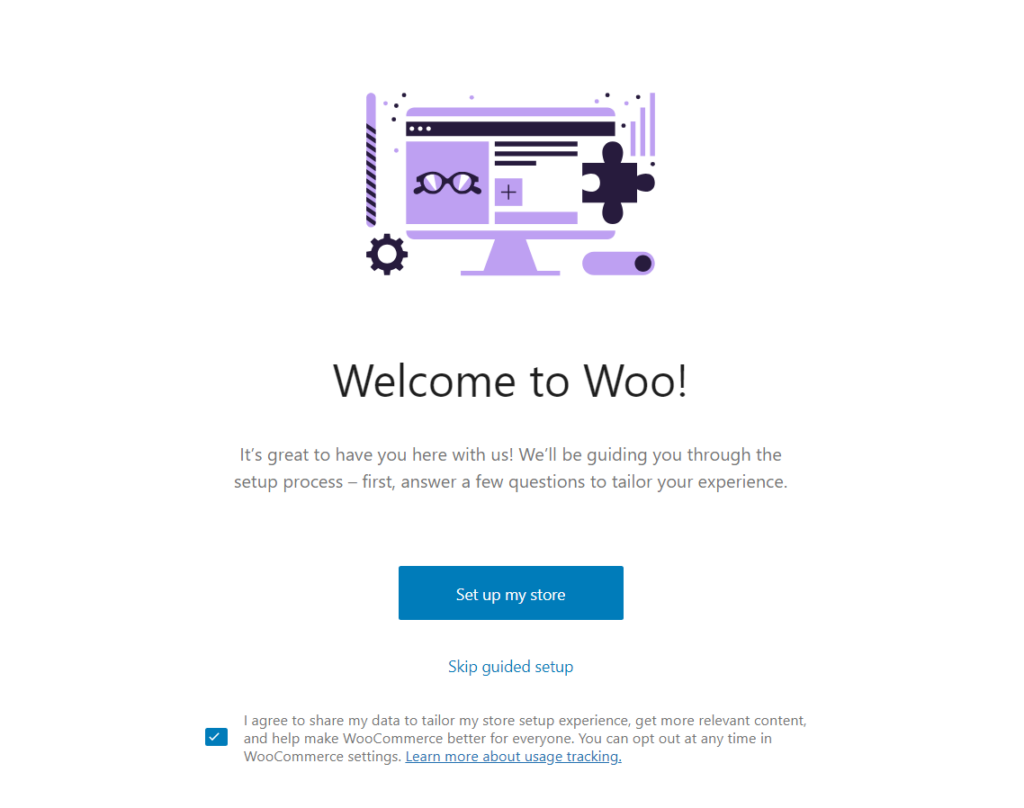
Step 4: Create an Ecommerce Website
Once activated, click “Set up my store”.
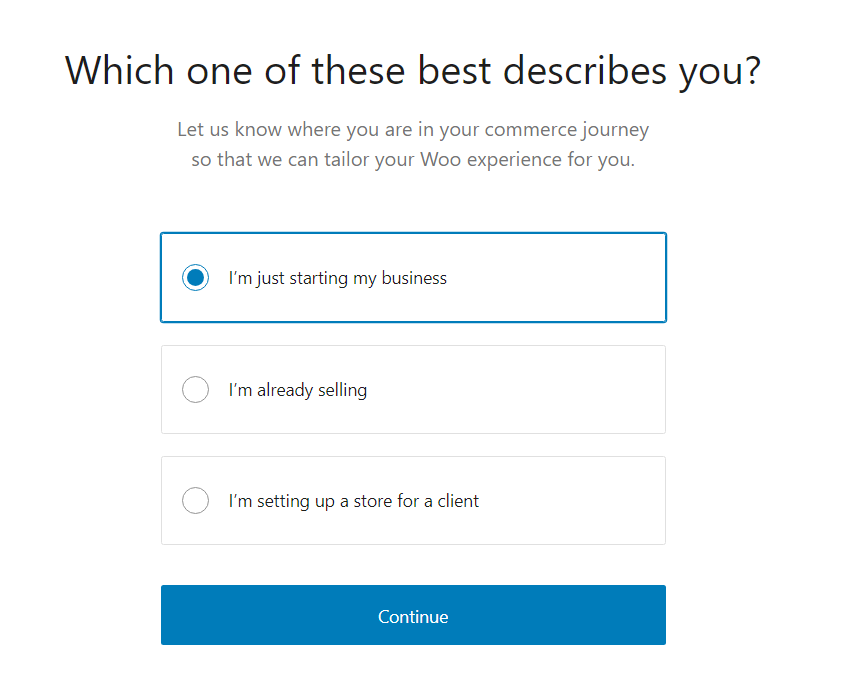
Choose the online store type from listed options and click Continue.
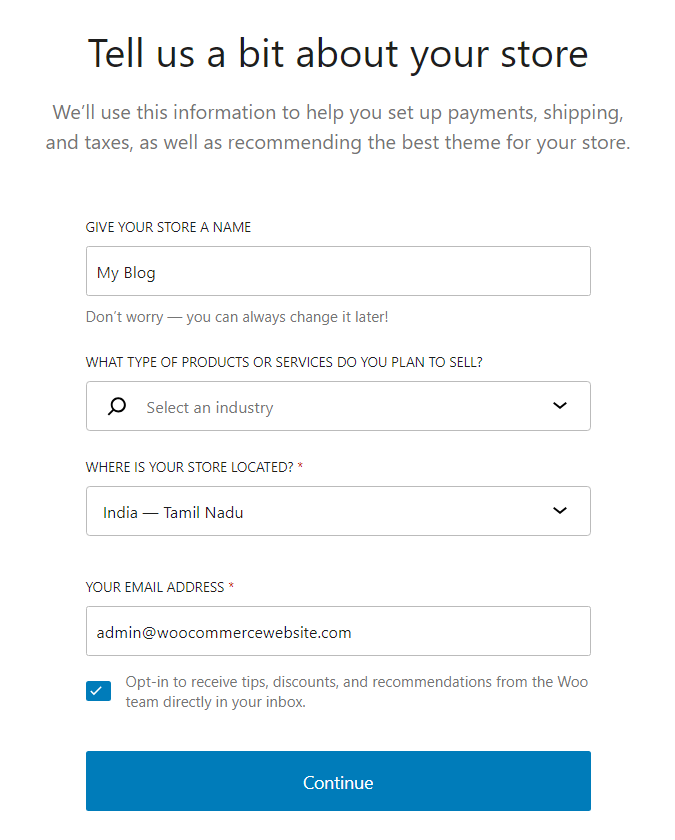
Enter your store information by selecting the type of product/service plan to sell and click “Continue”.
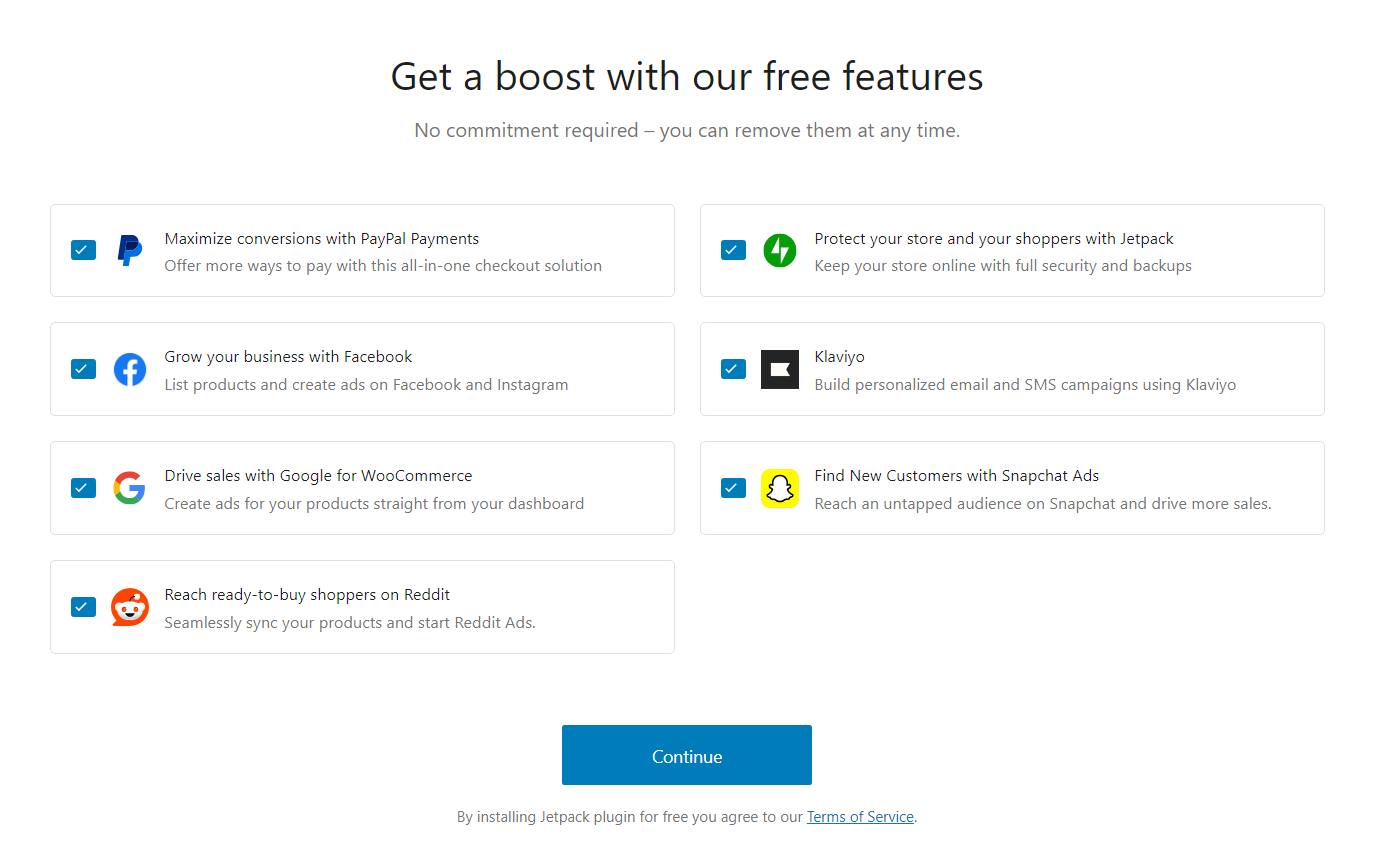
Install supported plugins which are essential features to boost sales and customize online store.
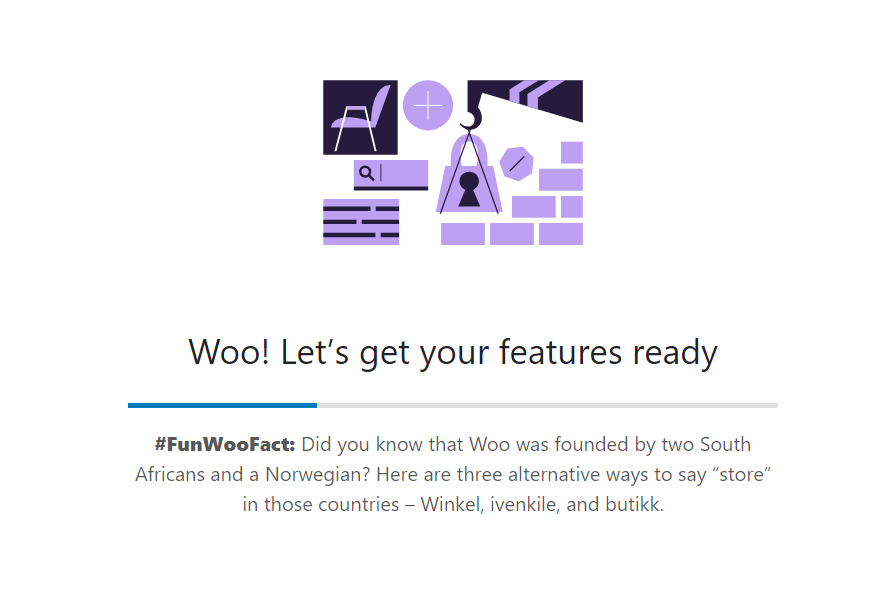
Once done, you will see the WooCommerce store getting processed to complete the setup.
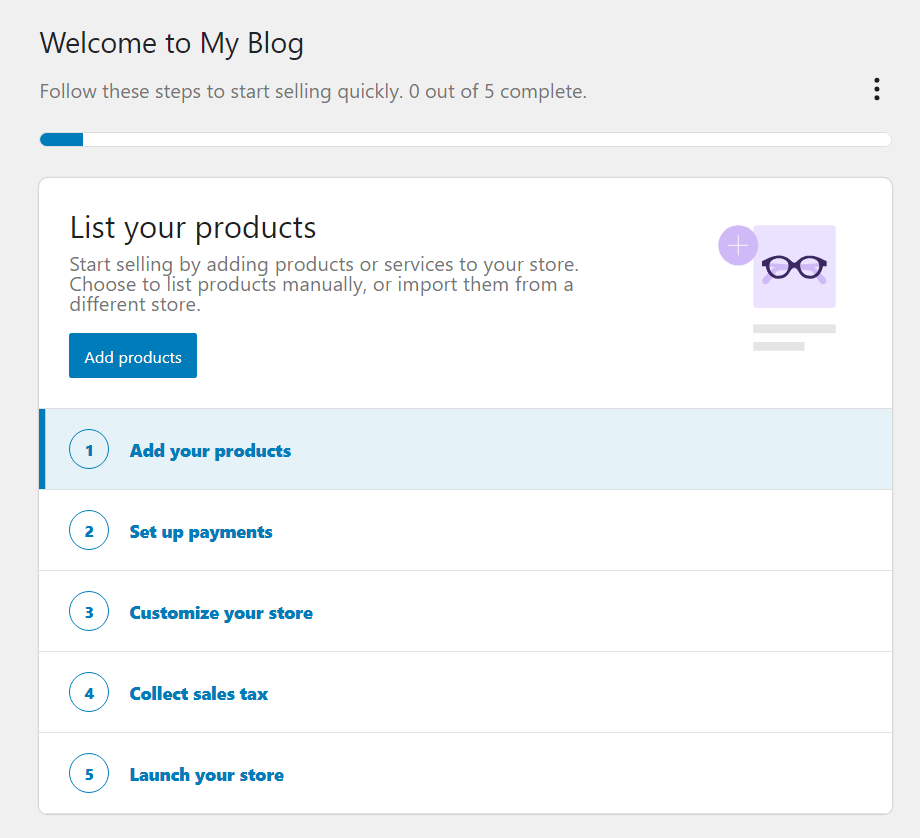
Step 5: Start Selling By Adding Products/Services
On each steps completion, go to home page on WooCommerce section to complete other steps.
1. Add your products
Click Add your products to your store by clicking Add Products button.
Now click product type from one suitable to your store niche.
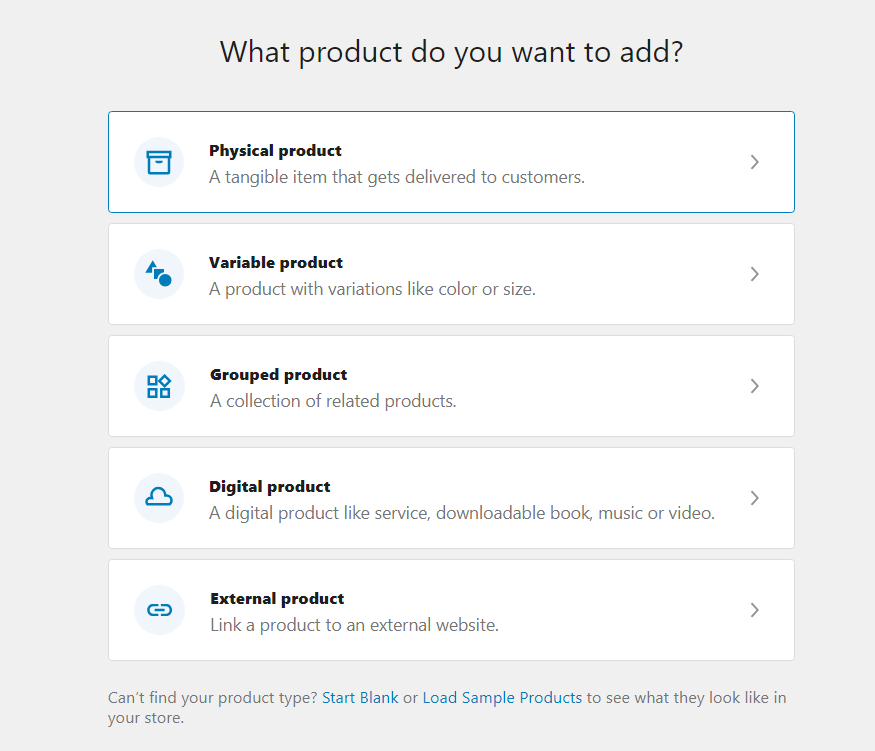
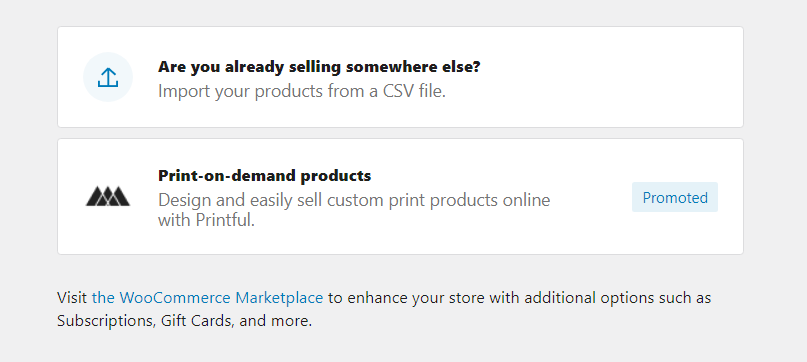
If you already have product added in any other website, you can import the products through csv file.
Enter the product title and description which you are adding.

Along with the above details, also enter the product data including price, inventory, shipping, Also tag category, image, tags and click Publish button.
Once added all the products, click Home option on left side to setup other features.
2. Set up payments
Choose the payment methods which you want to be available for your customers to make the payment for your products.
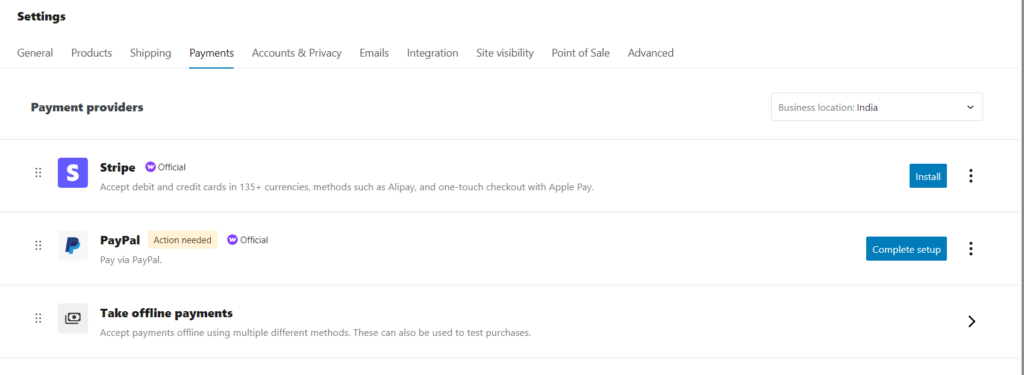
You can choose more payment options to configure other payment methods

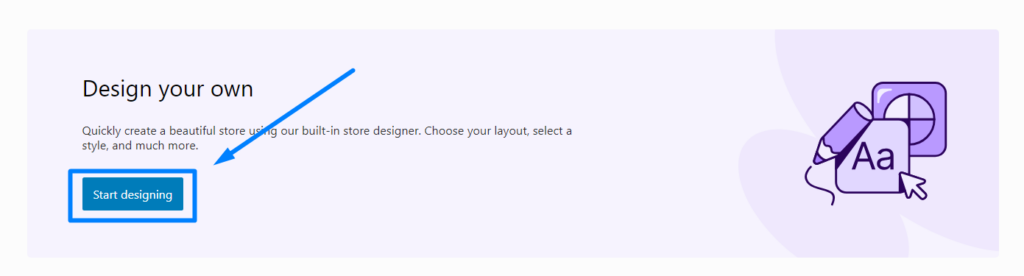
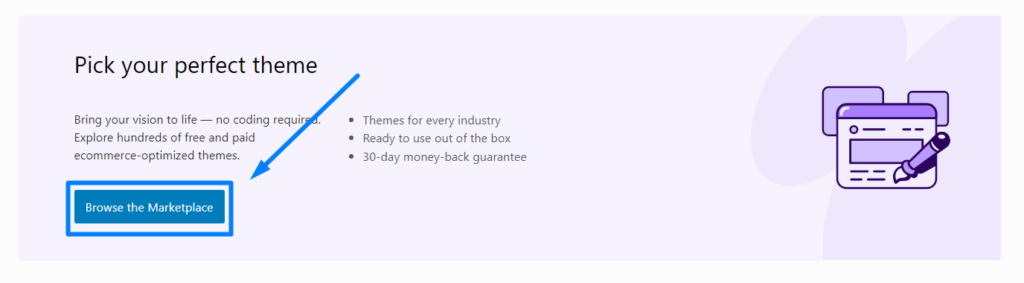
3. Customize your store
You can design your website by quickly creating a beautiful store using the built-in store designer. Click Start Designing button.
You can customize the content, add new pages, change the template, etc to build the content.
You can change the theme of the website by clicking the button – Browse the Marketplace if you want to import from WooCommerce platform.
4. Collect sales tax
To setup sales tax for your products, you need to setup store location and tax rates for the products. Now Enter the store location of your online store and click Continue.
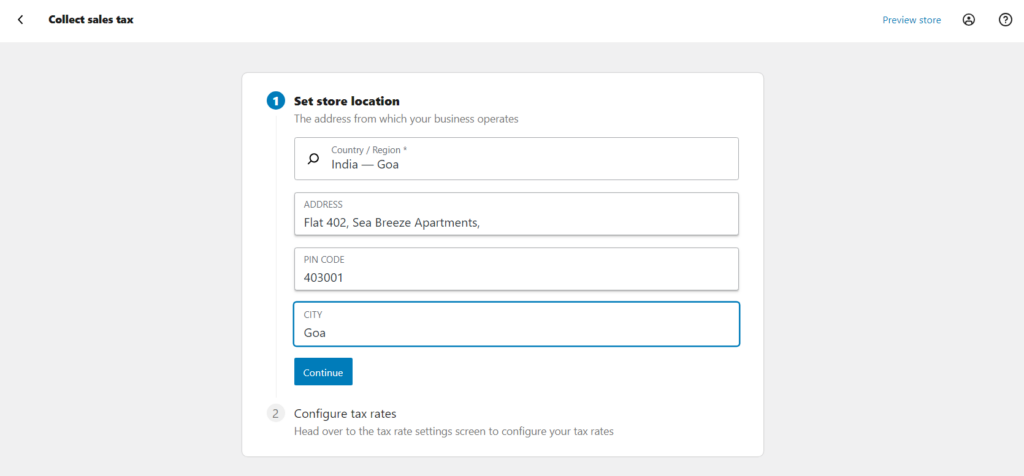
Next, click Configure button. Insert row and enter the details to apply in the products while your customers purchase the product. You can apply different tax rates based on the country, state, pin code and tax rates.

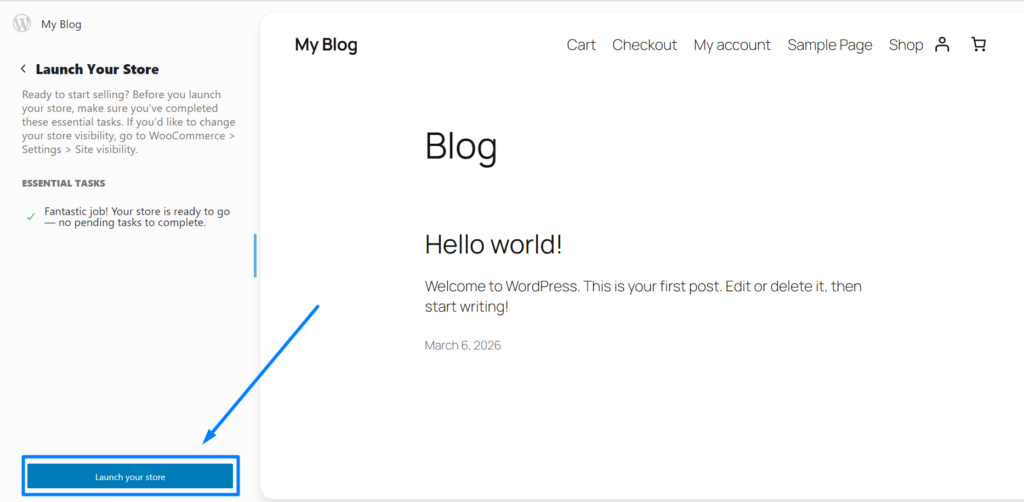
5. Launch your store
Now its time to publish your store after completing all the essential store basic setup features. Click Launch your store button on left corner.
Things to do next: Create an Ecommerce Website
click Grow your business option which is the first step to further extend your functionality of your online store.
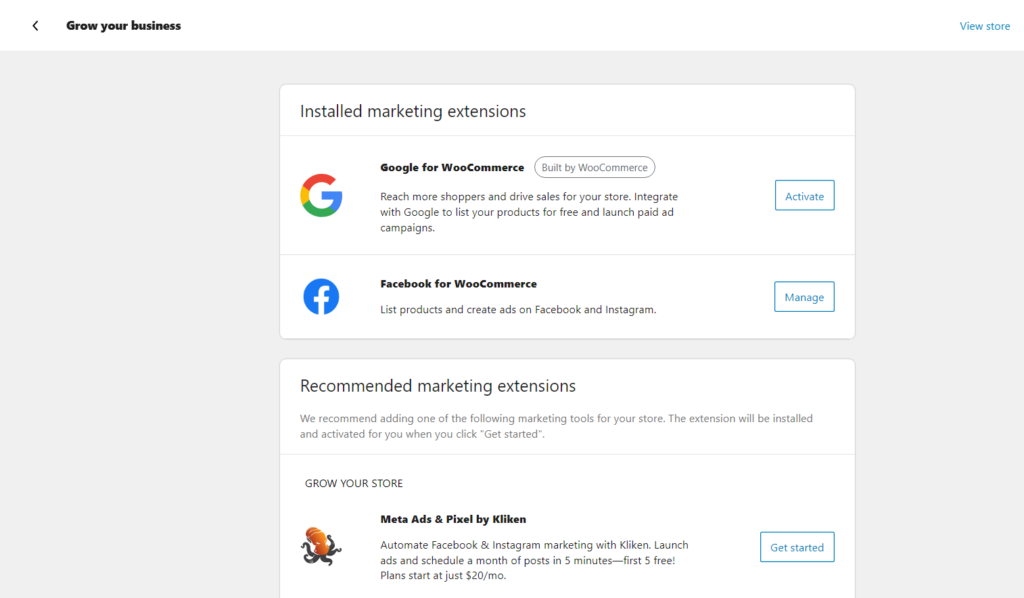
Set up additional payment options
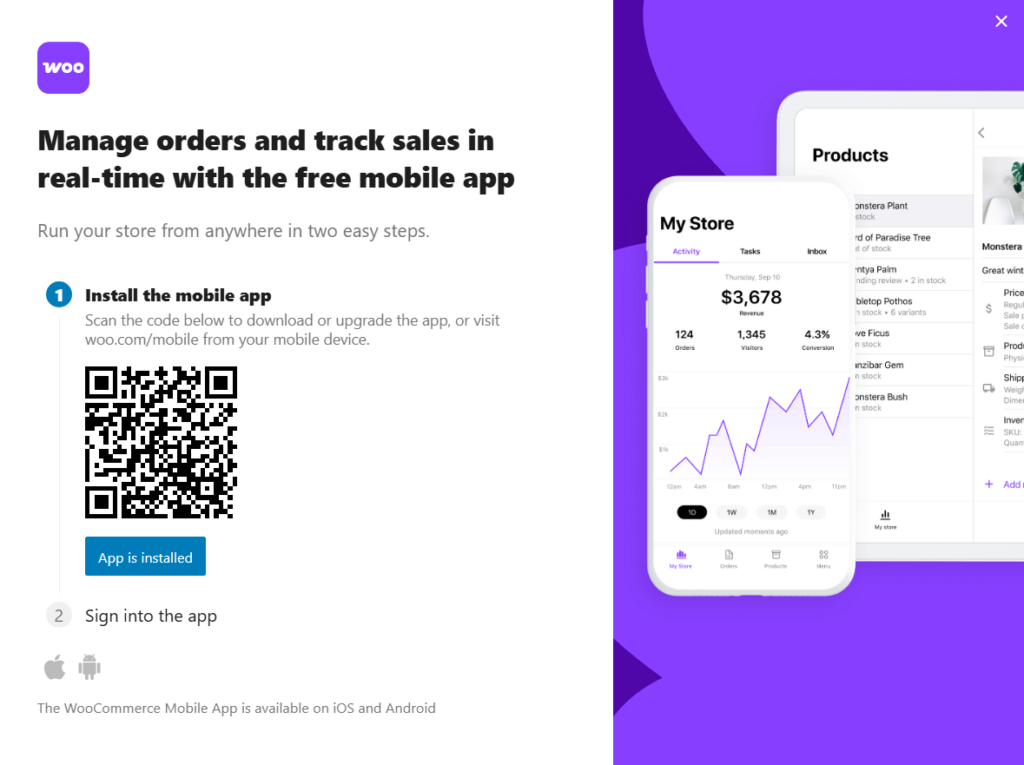
Get the free WooCommerce mobile app
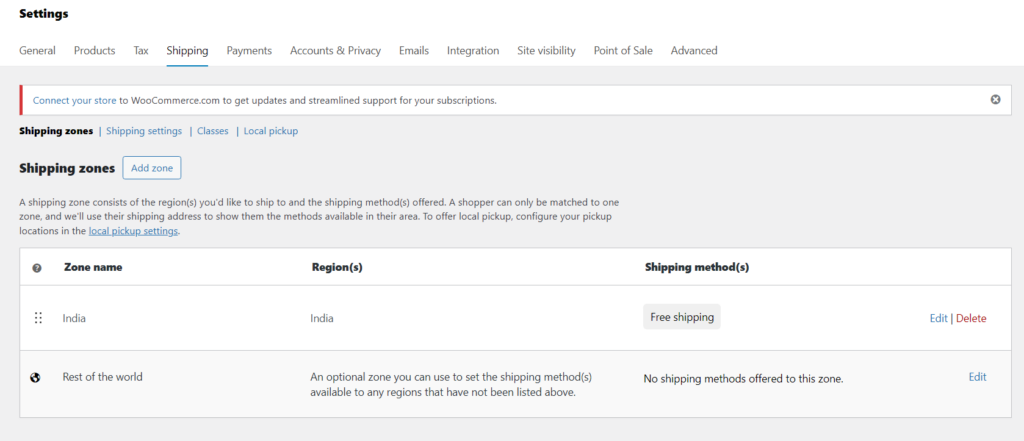
Review shipping options
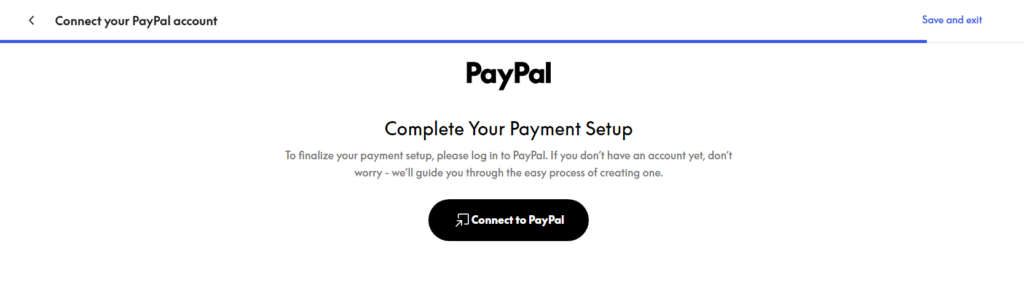
Connect PayPal to complete setup
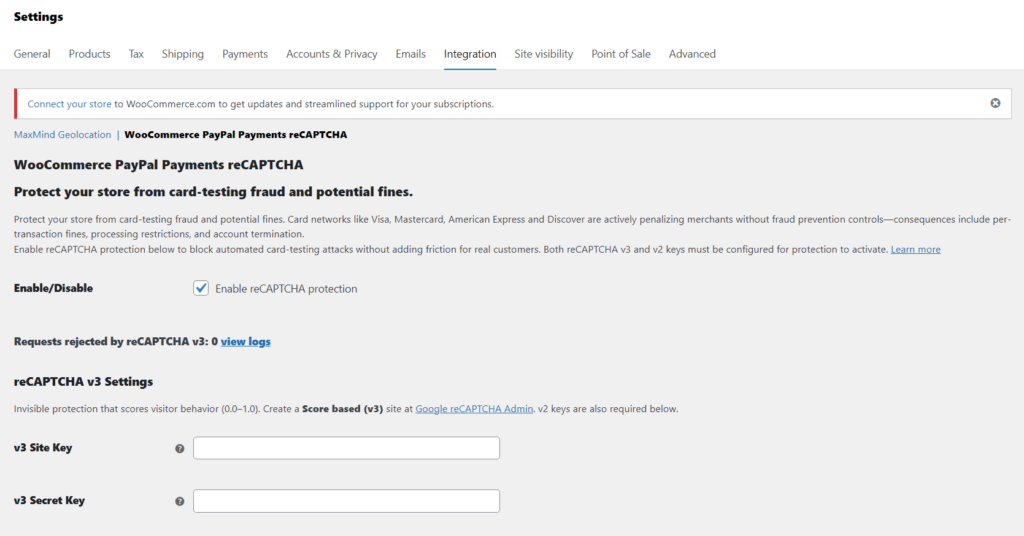
Enable required fraud protection for PayPal Payments with reCAPTCHA request enable on product pages.
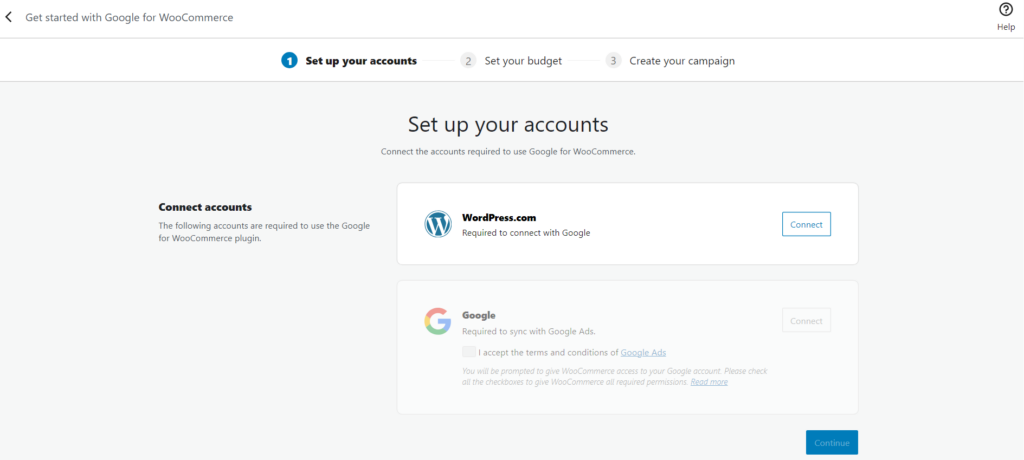
Set up Google for WooCommerce – Complete the three steps by Set up your accounts -> Set your budget -> Create your campaign so you can establish your store online including Google Search, Shopping, YouTube, and more.
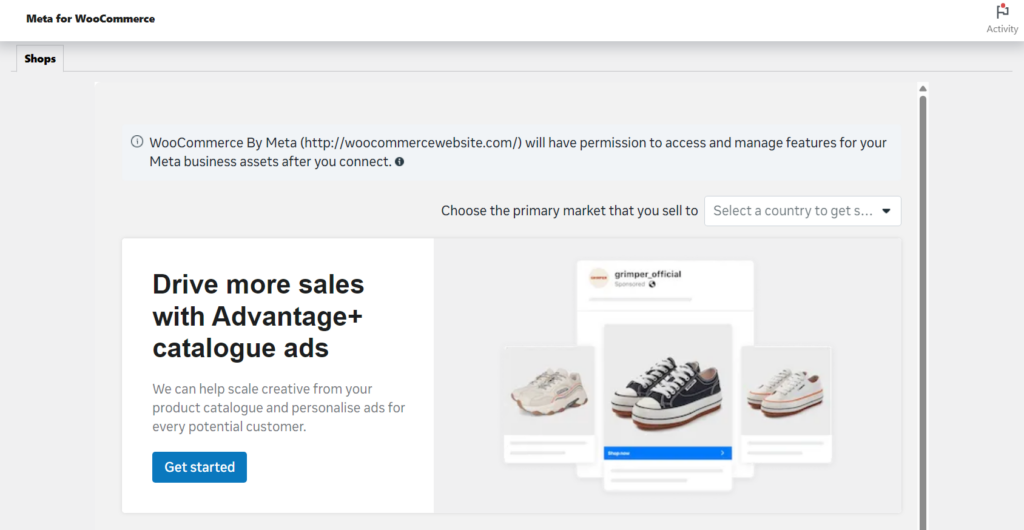
Advertise your products across Meta’s platforms, including Facebook, Instagram, and WhatsApp
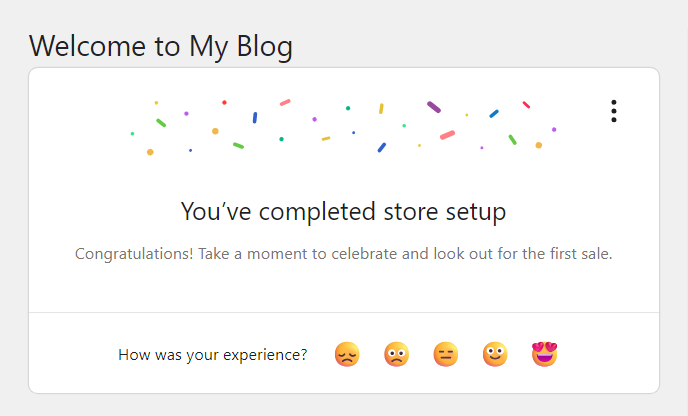
That’s it you have completed the WooCommerce online store setup including configuring the additional features to enhance the online store.
Video Reference:
Hope you establish your online store and run a successfully business store worldwide.