
How to Create and Restore Backup in Plesk?

By Karthi | June 10, 2026
To Create and Restore Backup in Plesk, utilise the built-in Backup Manager tool. This dashboard allows you to manually save configurations, schedule regular backups automatically, and selectively restore databases or specific file directories.
Steps to Create Backup in Plesk:
Step 1: Log in to your Plesk Control Panel.
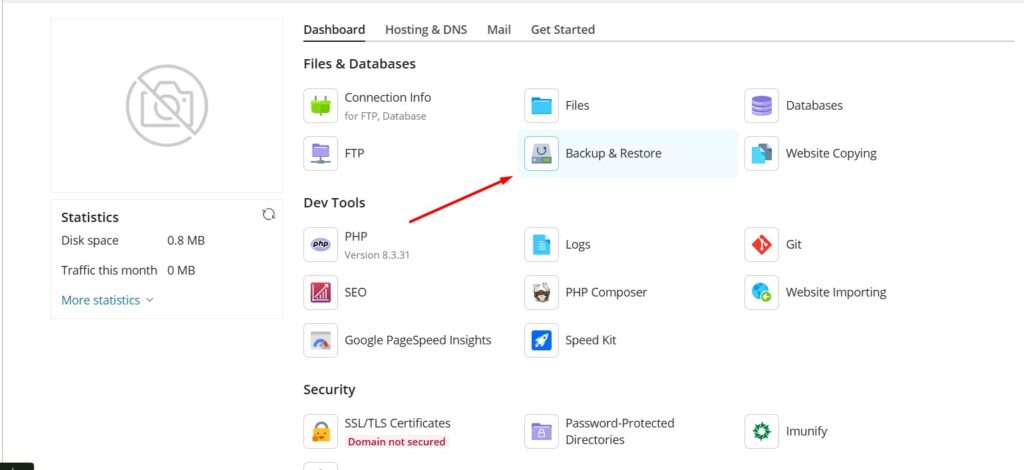
Step 2: Locate your domain and click on Backup & Restore option on the right side.
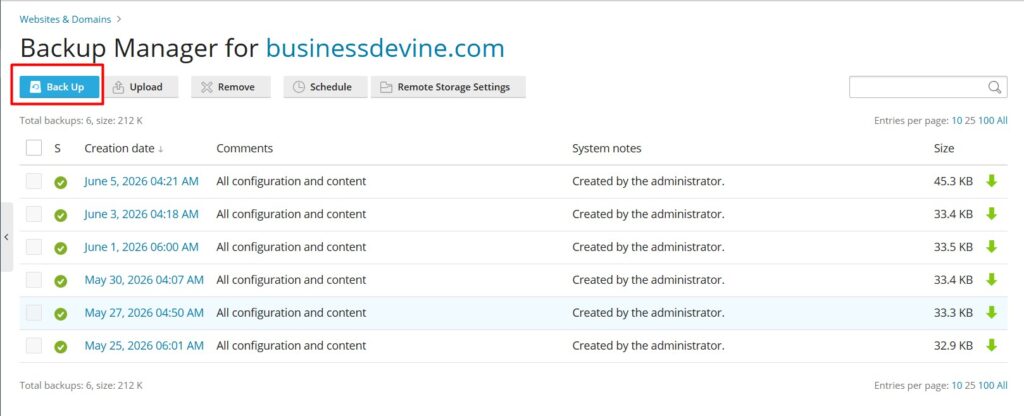
Step 3: Click the Back Up button on top
Step 4: Configure your backup preferences:
Backup: Choose to include mail, website files, or databases.
Store in: Select internal server storage or a configured remote storage.
Type: Select Full (entire system) or Incremental (only modifications since the last backup).
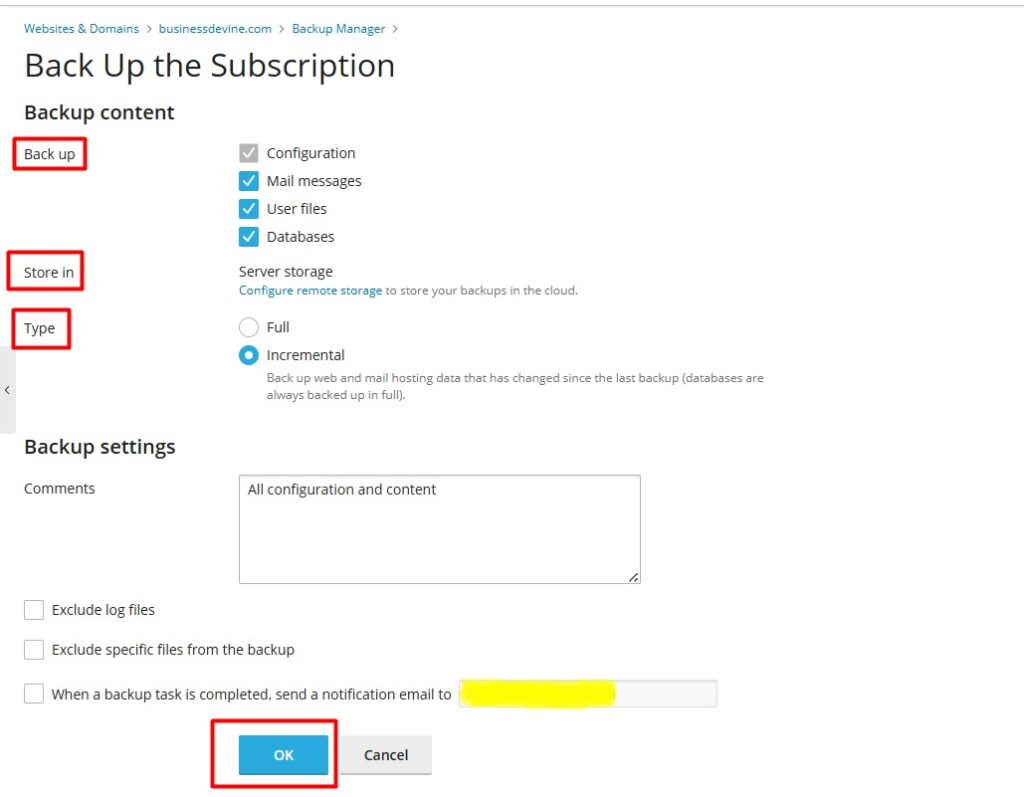
Step 5: Click OK button to process
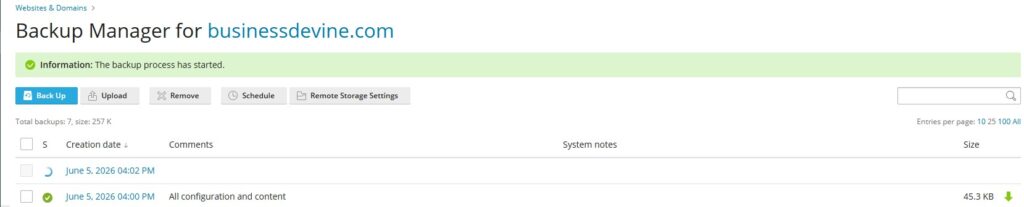
You will be returned to the Websites & Domains > Backup Manager screen, where you can see the backup being created.
Steps to Restore Backup in Plesk:
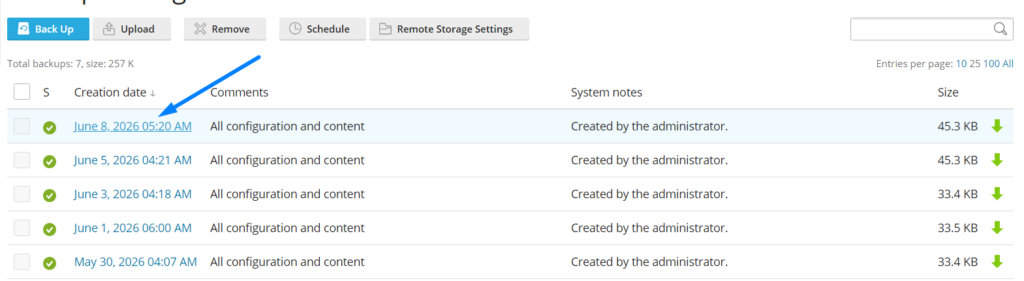
Step 1: In the same “Backup and Restore” option in plesk, click any of the backup which is already generated from the available date which you want to restore.
Step 2: Scroll down and select the option “All objects (entire system)” from which you can select components only to restore.
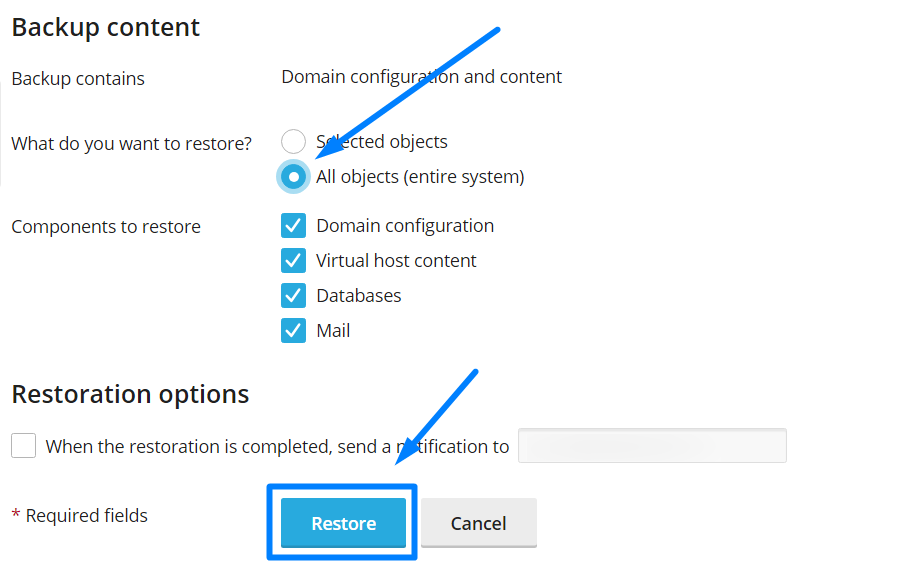
Step 3: Once done, click “Restore” button to restore the backup successfully.
NOTE: Check Upload Files in Plesk to upload your files.
The backup process can take some time to finish, depending on the size of the content you chose to back up during this step.
I hope this article helps you Create and Restore Backup in Plesk. Feel free to contact us via live chat if you need any assistance.