


How to Create and Manage Email Account in Plesk

By Karthi | August 13, 2026










Create email account in Plesk is a simple process that helps you establish a professional email address using your domain name. Whether you’re setting up a new mailbox for yourself or your team, Plesk provides an intuitive interface to create, manage, and update email accounts with ease.
In this guide, you’ll learn how to create and manage email accounts in Plesk, including setting up new mailboxes, configuring essential email settings, and modifying account details to keep your business communication secure and organized.
Steps to Create Email Account in Plesk:
Step 1: Log in to Plesk
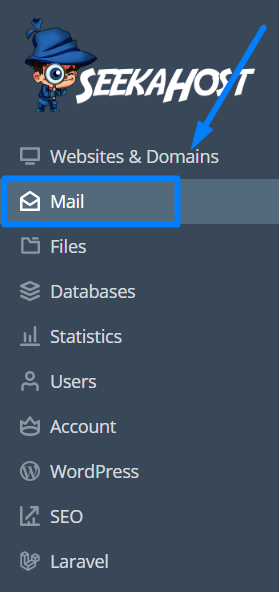
Step 2: From the left-hand navigation menu, click Mail.
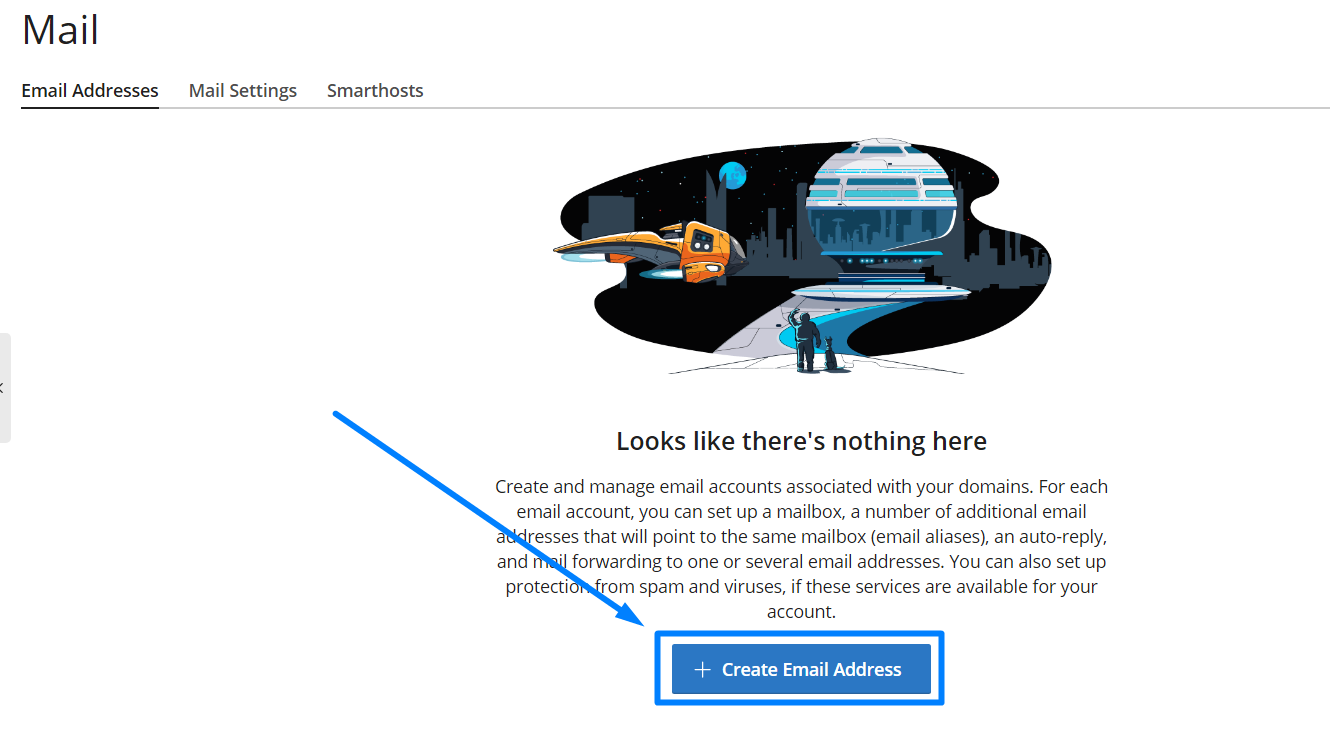
Step 3: Click Create Email Address.
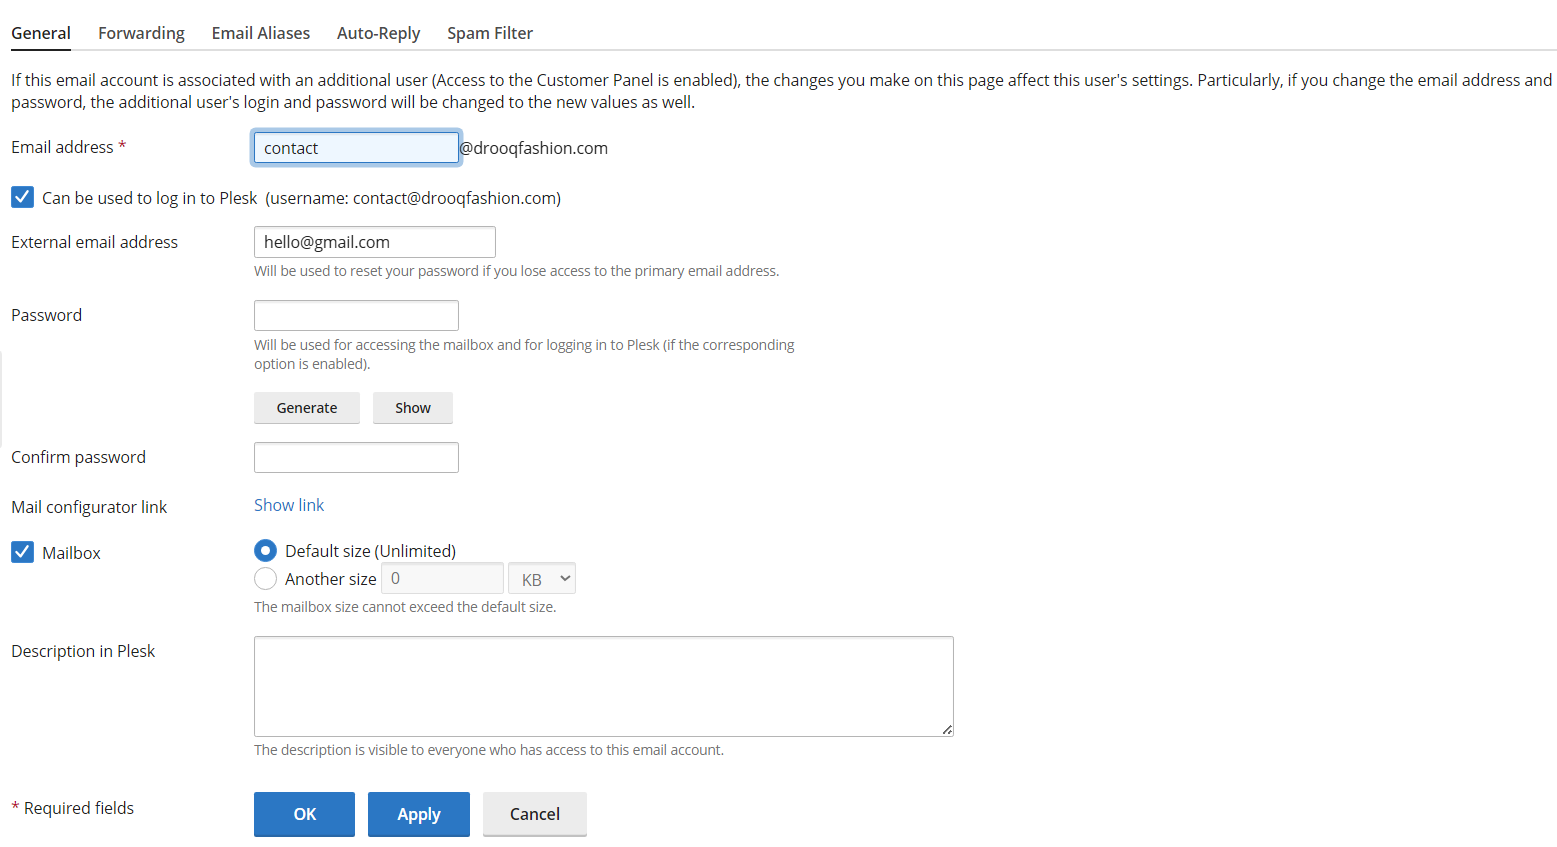
Step 4: Enter the required mailbox details
Email Address – Enter the user name
Password – Use Generate button to create password. You can click show button to display the password.
Mailbox – Set or change default mailbox size
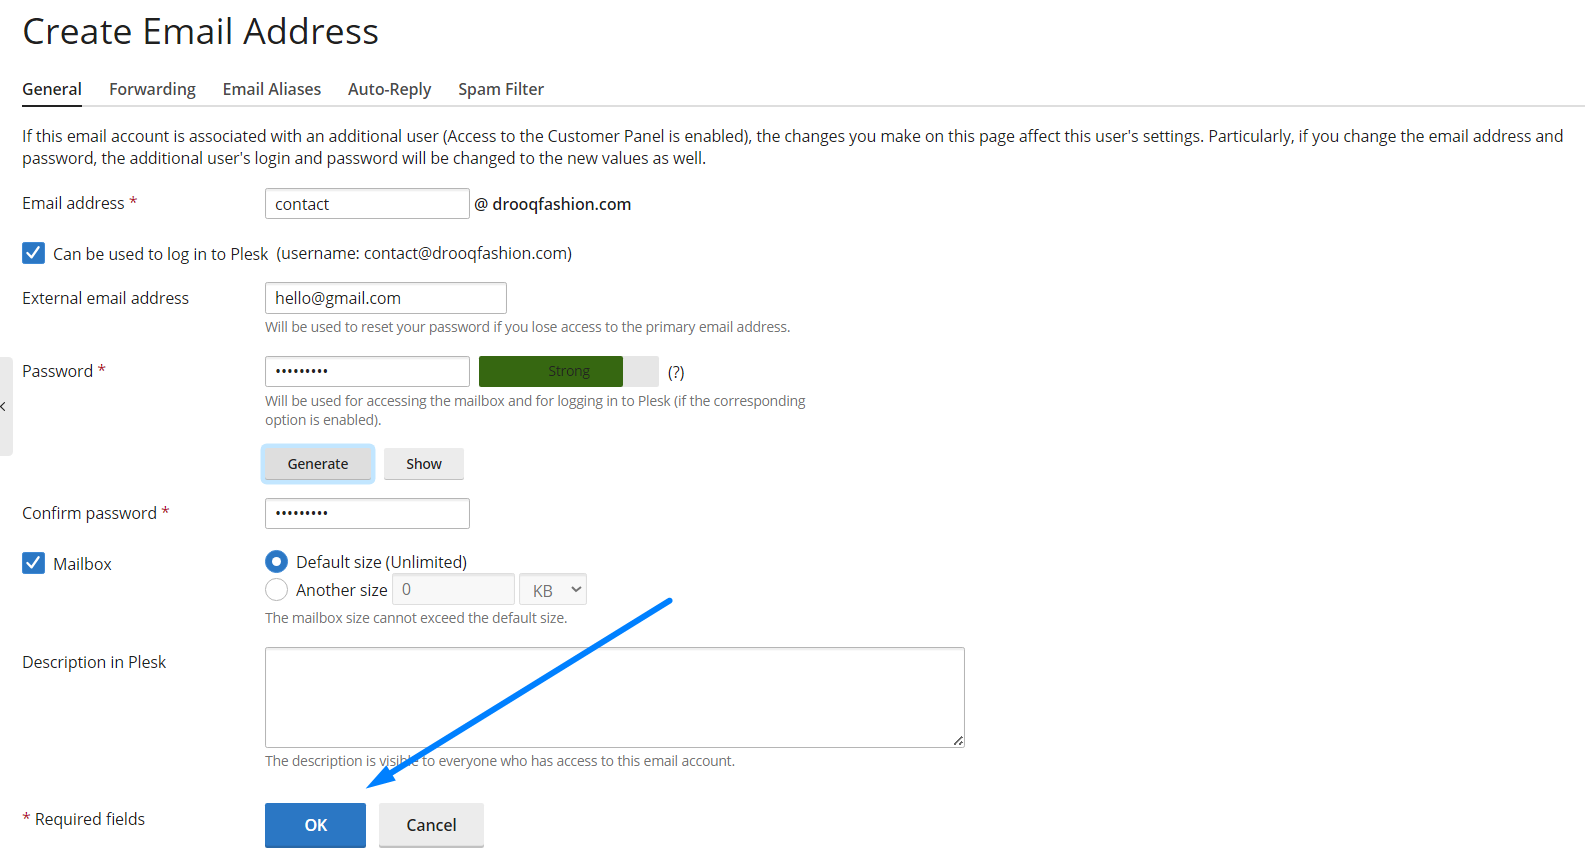
Step 5: Once done, click OK button to successfully create the email account.
How to Manage Email Accounts
Step 1: Select Mail from the left menu.
Step 2: Click on the email address you want to configure.
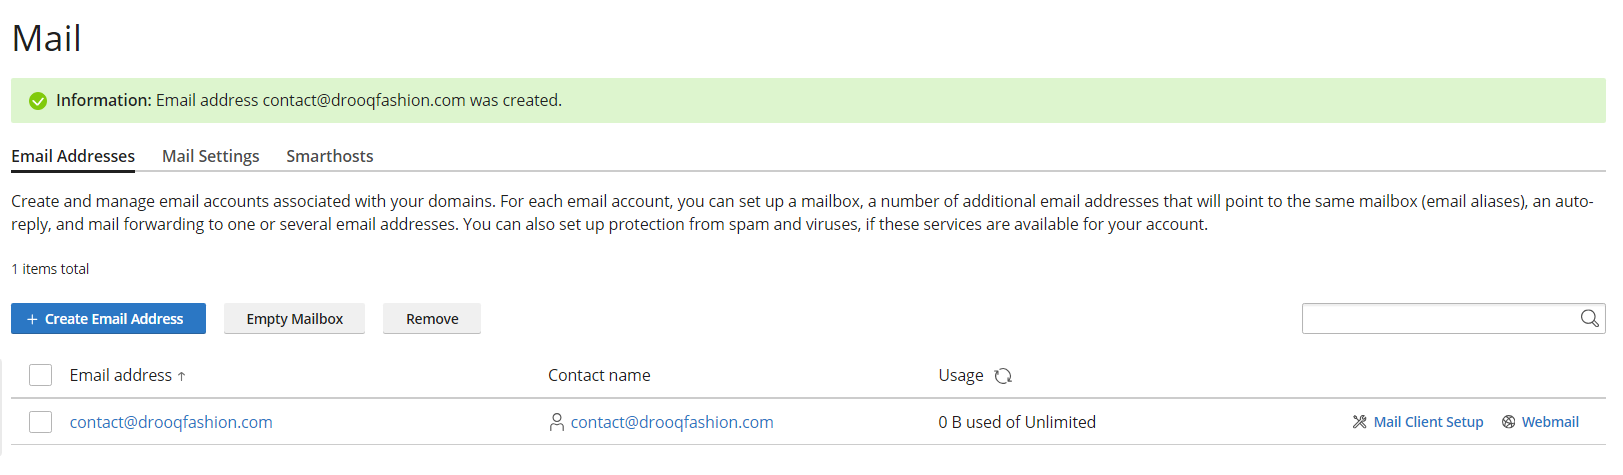
Step 3: Here you can easily update the settings for Forwarding, Email Aliases, Auto reply and spam filter.
Forwarding:
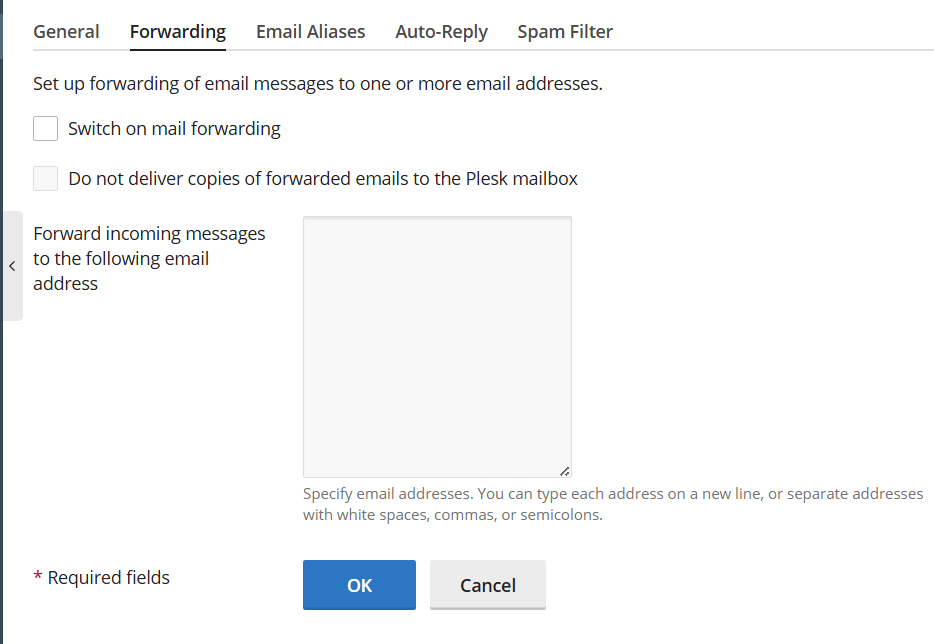
Enable Forwarding: click “Switch on mail forwarding” to activate it.
Keep Plesk copies: Leave the second box unchecked to keep backups in Plesk.
Delete Plesk copies: Select “Do not deliver copies” to keep emails only at the destination.
Email Aliases:
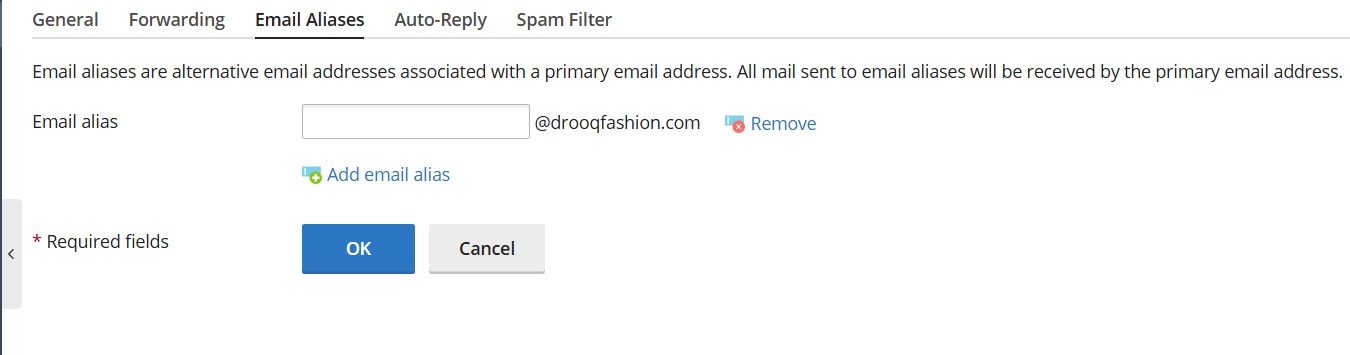
Email alias: Enter the alternative name for your primary email address in the text box.
Add email alias: Click this link to create additional alternative email names if needed.
Remove: Click this option next to any alias to remove it from your account.
Save changes: Click OK to apply your new alias settings.
Auto-Reply:
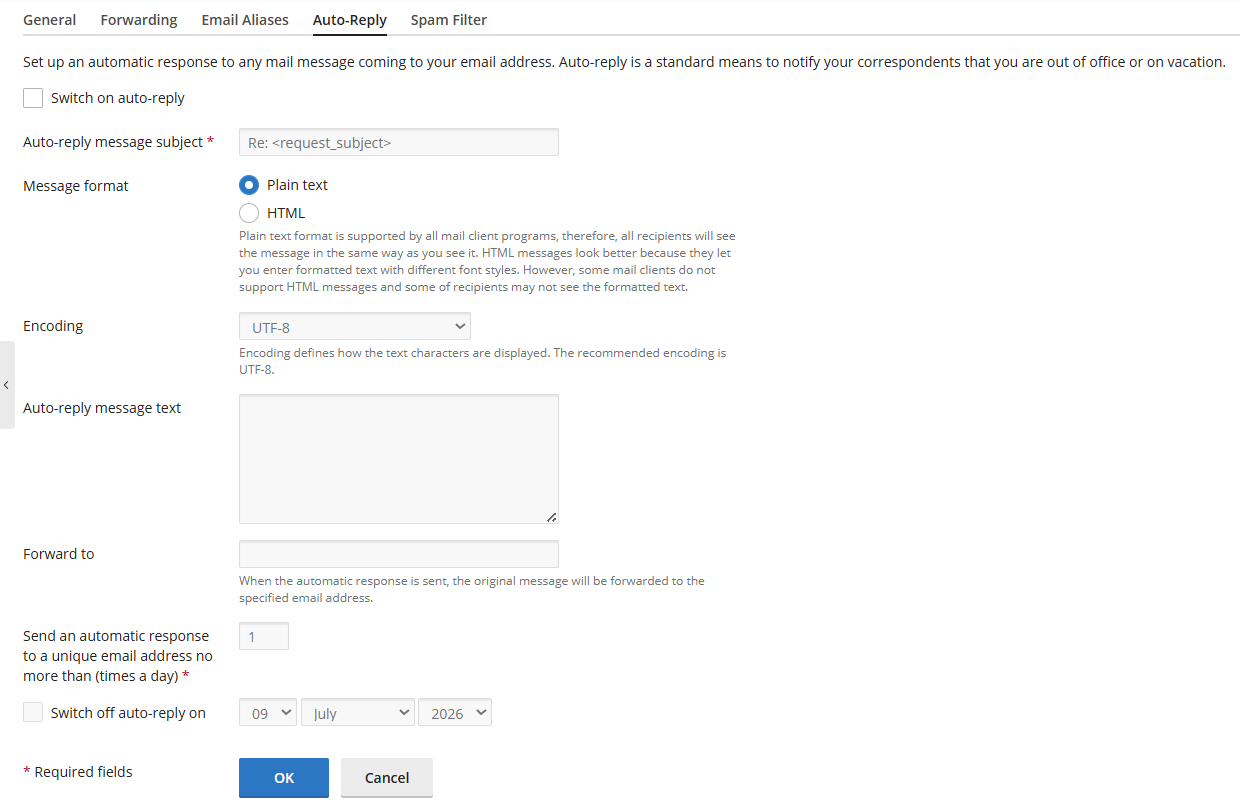
Switch on auto-reply: Select this box to enable automatic email responses.
Auto-reply message subject: Enter the subject line for your automated reply email.
Message format: Select either Plain text or HTML for the message styling.
Encoding: Select the character encoding type from the drop-down menu.
Auto-reply message text: Type your primary automatic response message in this text box.
Forward to: Enter an email address to forward original messages while auto-replying
Send an automatic response: Set the maximum number of daily replies per unique address.
Switch off auto-reply on: Check this box and choose a date to automatically disable replies.
Save changes: Click OK to apply your new auto-reply settings.
Spam Filter:
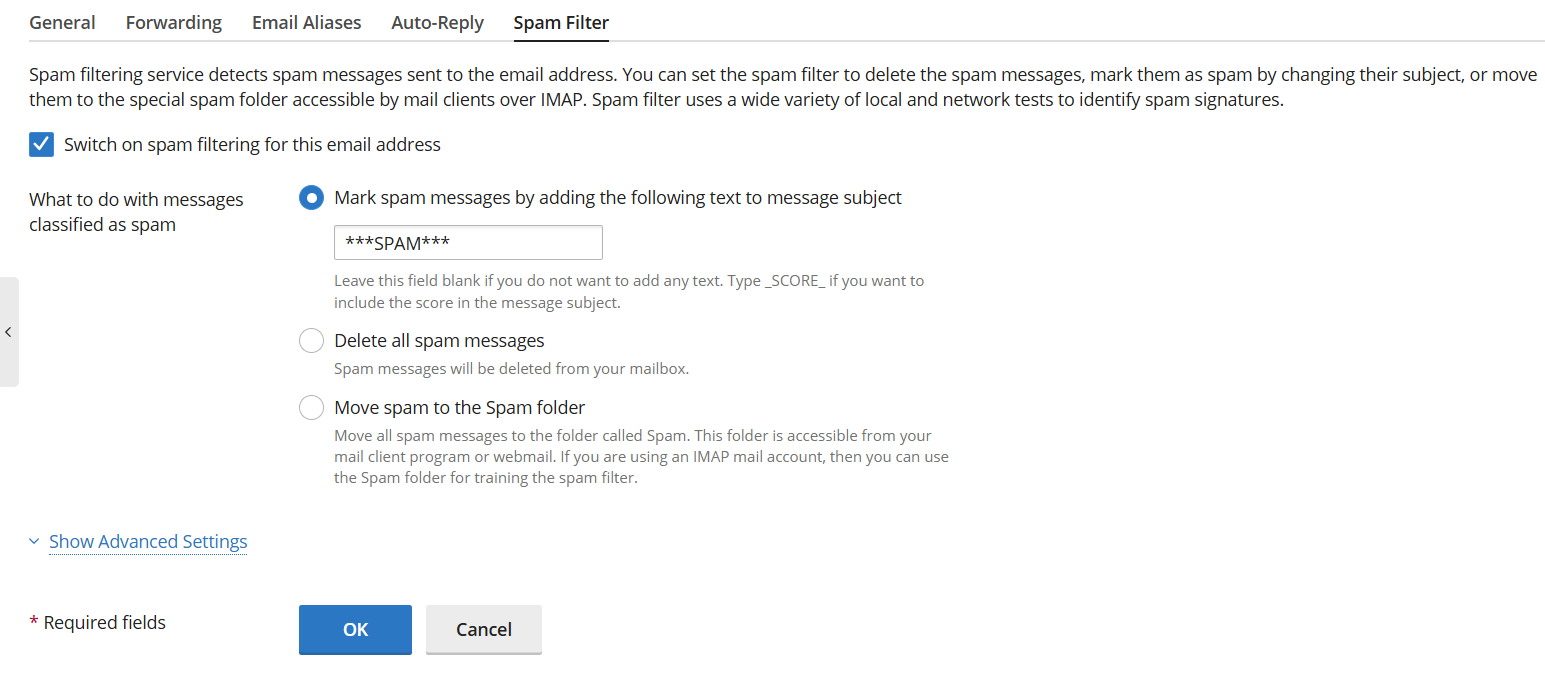
Switch on spam filtering: Select this box to enable the spam detection service.
Mark spam messages: Select this to add custom text, like SPAM, to subjects.
Delete all spam messages: Select this to automatically erase junk emails right away.
Move spam to the Spam folder: Select this option to store junk messages in a separate folder.
Show Advanced Settings: Click this link to open more advanced filter customization options.
Save changes: Click OK to apply your new filter settings.
Step 4: Click OK or Apply to save the changes.
Best Practices After You Create Email Account in Plesk
To keep your email account secure and reliable:
- Use a strong, unique password.
- Update passwords regularly.
- Enable spam filtering to reduce unwanted emails.
- Monitor mailbox storage to prevent it from reaching its limit.
- Remove unused email accounts when they are no longer needed.
- Configure email forwarding only when necessary.
Troubleshooting:
If you cannot create email account in Plesk, check the following:
- Verify that your domain has email services enabled.
- Ensure your hosting plan includes email functionality.
- Confirm that mailbox storage limits have not been exceeded.
- Check that the email address is not already in use.
- Contact your hosting provider if mail services are disabled on the server.
Relevant Articles:
1. Upload Files in Plesk File Manager
2. Create and Restore Backup in Plesk
Video Reference:
Once you create email account in Plesk, managing your business email becomes simple and convenient. From creating new mailboxes to updating passwords, configuring forwarding, and enabling spam protection, Plesk provides all the tools needed to keep your email accounts secure and organized.
Setting up and managing your email in Plesk is a straightforward process that takes only a few minutes. Now that your mailboxes are configured, you are ready to send secure, professional emails under your own domain name.
Contact our live chat support if you need any assistance during the setup process.