How to Install Free SSL certificate in cpanel

By Gowdham | August 11, 2025
Is SSL important? Whether all websites need SSL?
Let’s get into the topic!
SSL(Secure Sockets Layer) is used for a secured channel between the server and the client. While we search for something in google we found that it is secured connection or not. If it is displayed in HTTP it is an unsecured connection or it displays HTTPS then it is a secured connection. SSL is one of the SEO factor. Also, for business sites it builds the trust for the customers.
If SSL certificate is installed, the encrypted data is seen only by source and destination nobody will able to decrypt your data while transaction.
For the secured connection we need to install the SSL certificate.
Here we going to see how to install the SSL certificate to your domain.
- Go to your Cpanel account. Type your username and password. Click login.

- Search for the SSL in the search bar. Now you see the SSL/TLS and SSL/TLS status toolbar.
- Click the SSL/TLS option under the “Security” section.
 Click on Manage SSL sites.

- Check already SSL certificate is installed or not. If it installed then you need to uninstall the SSL certificate. You find the uninstall option in the manage installed SSL websites. Click on the uninstall button it will get uninstalled.

- Once uninstalled, return back to search bar and search for SSL/TLS status toolbar. Click on that.

- To run auto SSL select all the domains and then click on the Run Auto SSL button. It will take sometime to execute.
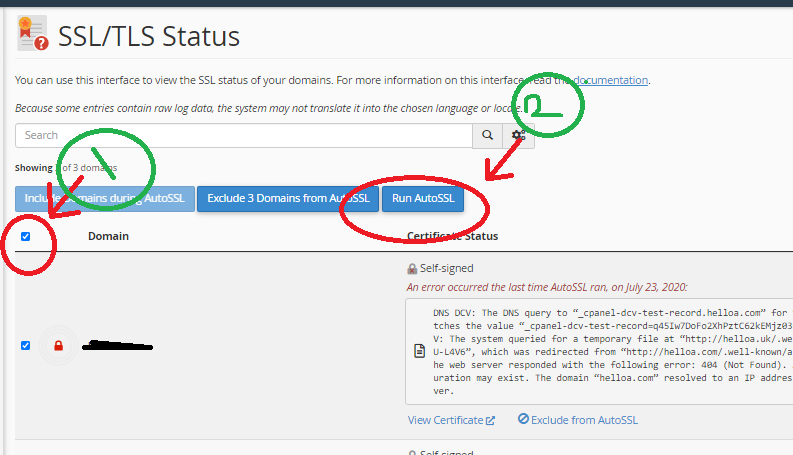
- After the execution is completed it will auto refresh your website. Now SSL certificate is installed for your domain.
- If the website loads with both http and https but you want to load only with https, kindly update the URL in phpMyAdmin -> Database -> wp_option and update the website name with HTTPS.
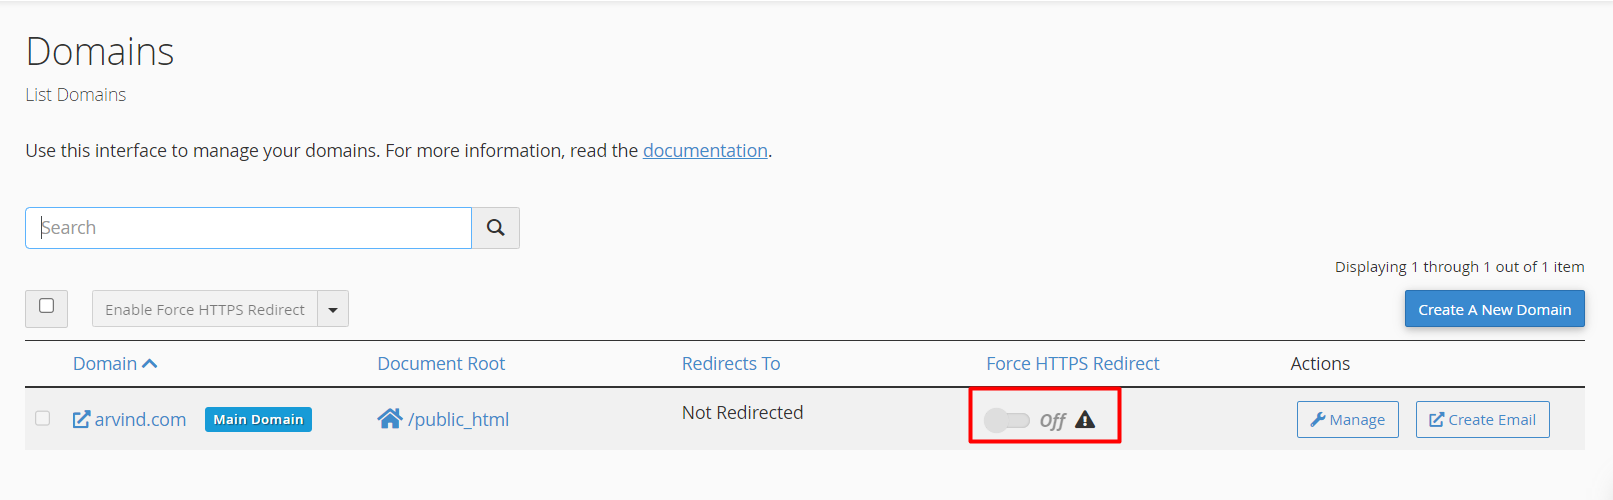
- Also do force redirect on the “domains” section for the domain to redirect the website from http to https if visitor visit the website on http.
Things to Consider for SSL Insecure Error:
1. If you pointed the A record or nameserver for the domain to the hosting provider, wait for 24 to 48 hours before install or Auto run SSL for the website.
NOTE: If your website is hosted with SeekaHost, SSL will be automatically installed within 12 hours after updating the nameservers—no need for manual installation.
2. Check Disk Usage exceeded for the website in cPanel. If exceeded, then remove bigger size files to reduce the disk usage and install SSL.
3. If disk Usage not exceeded, then check File usage/Inode count exceeded for the website in cPanel. Remove more number of files to reduce the count and install SSL.
NOTE: If you don’t see such option, then contact the hosting provider to enable that option.
4. For website loading with both http and https version, make sure you have enabled “Force https redirection” toggle on under domains option in cPanel to load only in https version.
5. If your website redirects to another website when load with https version, then check if any of your files is mentioned with http version. If not, install “Really simple SSL” plugin and configure to avoid mixed content.
In case you’re looking for OV, DV, EV Cerificates you can purchase SSL Certifcates and configure with your website.