How to Enable Two Factor Authentication in SeekaHost India Client Area?

By Arshath | November 2, 2022
Two Factor Authentication
As all of you know, the security feature is a must for all the portals we are accessing through. Whatever we are going to access, you must ensure that there are some basic protection and measures taken to protect that portal.
To be part of it, We have made an upgrade to our system by adding this security function for your SeekaHost Account.
Here I am going to explain How to Enable and Disable it for your Account which is Extra protection.
Enable Two Factor Authentication Process:
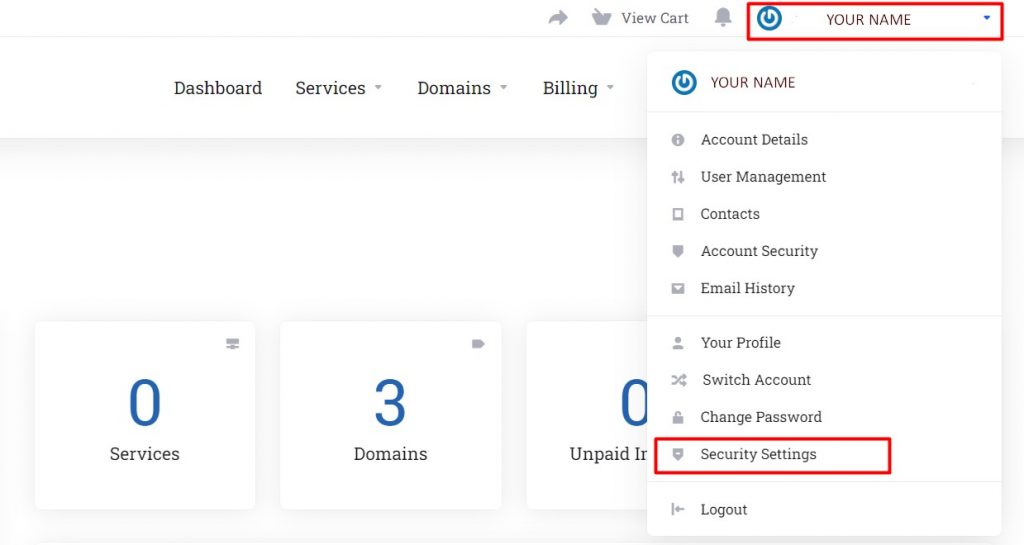
Step 1: Log in to the client area -> Profile -> Security Settings

Step 2: Now click the “click here to enable” button.

Step 3: Get started.
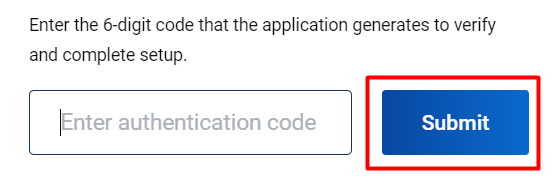
Step 4: You will be requested to enter the authentication code which you have received in the respected portal generated.
Use either Google Authenticator or Duo app for authentication code generation. Once logged in to that app, you can either scan the QR code or enter the code which will be shown above the QR code.
Once done, enter the code you got in the submit box.

Step 5: Click close. Now it is successfully enabled. If you want to log in to your account you have to do the above authentication code verifying process to log in to your account.
Process To Disable:
Step 1: In the security settings, click “Click here to Disable”.

Step 2: Enter the client area login password in the box and click “Disable Two-Factor Authentication”.
Now you have successfully disabled it. Make your account protected from anyone accessing it without your code.

If you are a registered user in SeekaHost India and have any queries to be clarified or issues to be sorted, you can raise a ticket through the client area dashboard or email to [email protected]. For immediate interaction or guidelines, contact our support team available in Live Chat at the right bottom corner of the website.
