7 Steps on How to Add Products in WooCommerce

By Arshath | June 3, 2026
You have probably setup WooCommerce website already and ready to start selling your products online. Then you start to wonder “How to Add Products in WooCommerce” on your website so you can sell your product in your online store your visitors.
More than what you can imagine is what WooCommerce can does for you with your online store setup where adding products is one of them.
Let’s give you easy guide on how to add products in WooCommerce WordPress.
Steps to Add Products in WooCommerce:
Ensure you have Create an Ecommerce Website with WordPress already.
Step 1: Login to WordPress
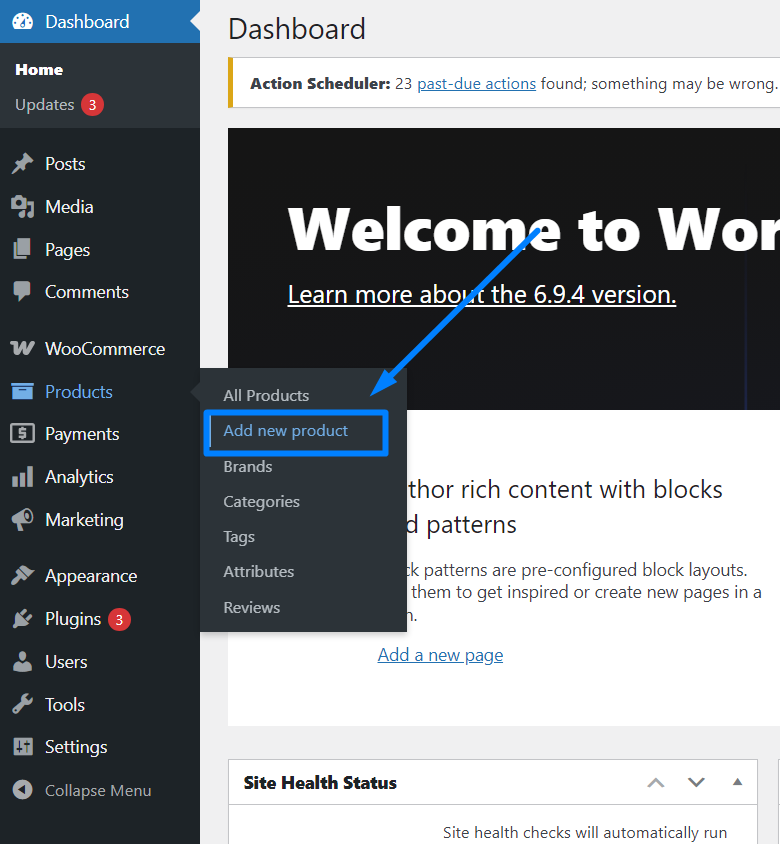
Step 2: Under product section on left side, click “Add products” in WooCommerce option.
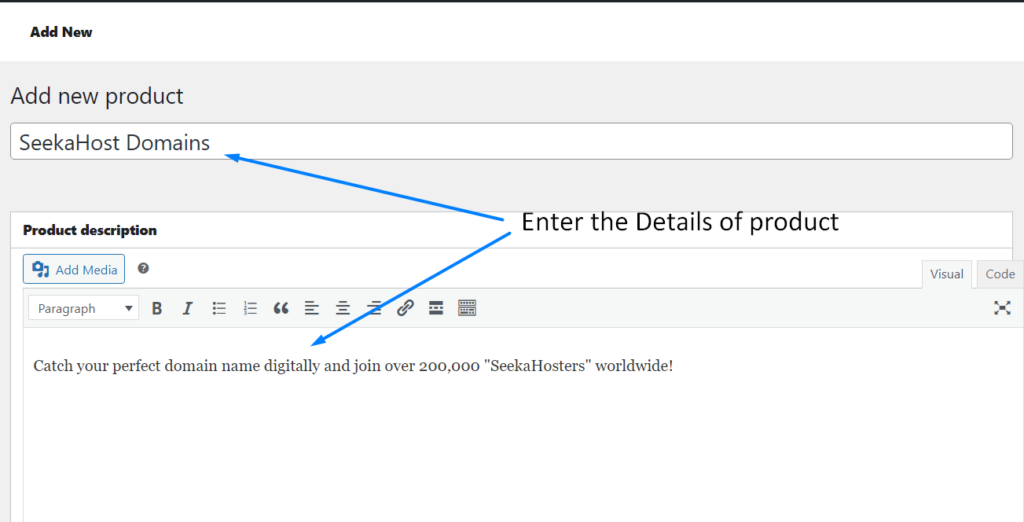
Step 3: Enter the product title and description which add Products in WooCommerce.
In product name, enter your product title or name of the product. In product description, write a short description about the product.
Along with the above details, also enter the product data including price, inventory, shipping, Also tag category, image, tags.
Step 4: Scroll down and Choose Product Type.

Simple product:
A simple product represents one single item with no variations, such as a single book, a T‑shirt in one size, or a basic physical gadget. It has a fixed price and can be either physical or digital, depending on settings.
Grouped product:
A grouped product lets you bundle several simple products under one “parent” listing, like a set of matching mugs or a collection of related tools. Each child item has its own price and can be added separately to the cart, allowing customers to choose only what they want.
External / Affiliate product:
An external (or affiliate) product is a link to buy something outside your site, such as on Amazon or another marketplace. Instead of handling stock or checkout, WooCommerce redirects the customer to the external URL, making it ideal for affiliate marketing.
Variable product:
A variable product is used when a single item comes in different options, like size, color, or material. Each variation can have its own price, stock, and SKU while still appearing as one product page, improving layout and user experience.
Virtual product:
A virtual product is intangible, meaning it does not need shipping (e.g., online consultation, design service, or membership access). In WooCommerce, you just mark a simple product as “virtual,” and the system skips shipping fields on checkout.
Downloadable product:
A downloadable product lets customers buy and download a file after purchase, such as an eBook, software, or PDF. Marking a simple product as “downloadable” enables upload of the file and controls like download limits and expiry dates.
We will go with simple product type. Here we need to fill the regular price, sale price, tax status and tax class.
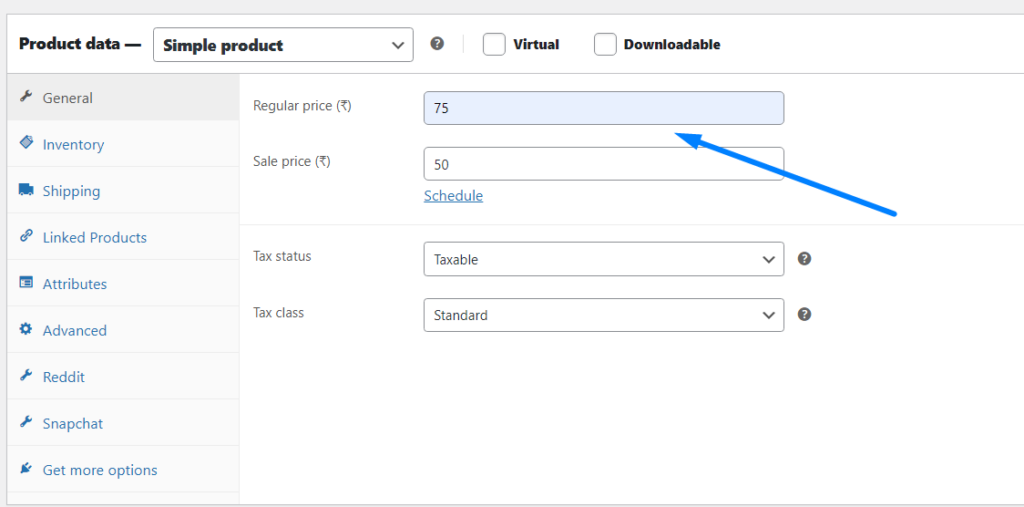
Here,
- Regular price: Standard price of the product without any discount
- Sale price: Discounted price of the product (should be lesser than regular price).
- Tax status: This option allows you to determine if taxes apply to the full product price, just the shipping cost, or not.
- Tax class: This option lets you select the type of tax that applies to your product.
NOTE: The information to fill differ based on the product type you choose.
Inventory:
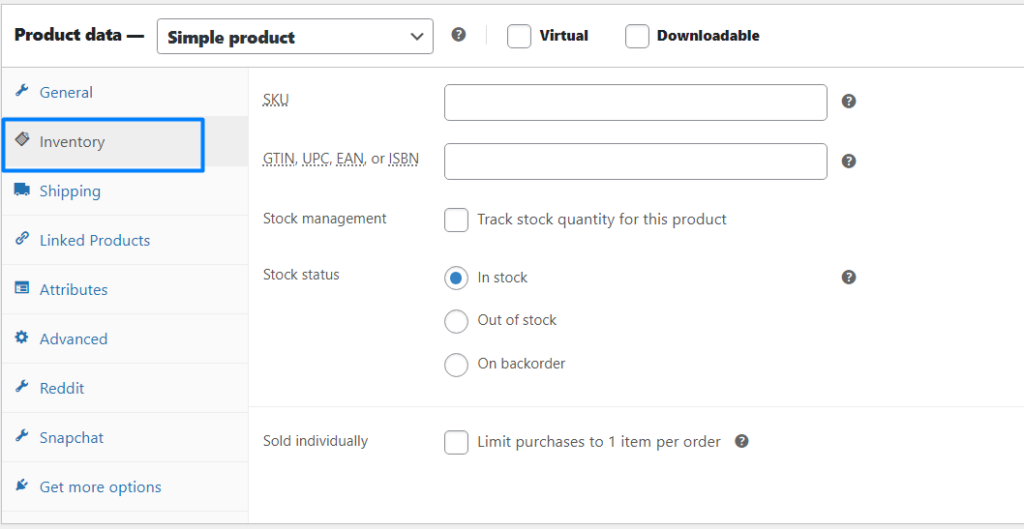
Here you need to fill the inventory stock details with the barcode to distinguish each product
- SKU – Stands for “Stock Keeping Unit,” a unique code assigned to products.
- GTIN/UPC/ISBN – Unique barcode to list the product on other marketplaces.
- Manage stock – This setting lets you control stock levels, which we’ll explore shortly.
- Stock status – This option is disabled when stock management is enabled; it indicates if the product is available for sale.
- Sold individually – This feature prevents customers from buying the same product more than once in a single order.
Shipping:
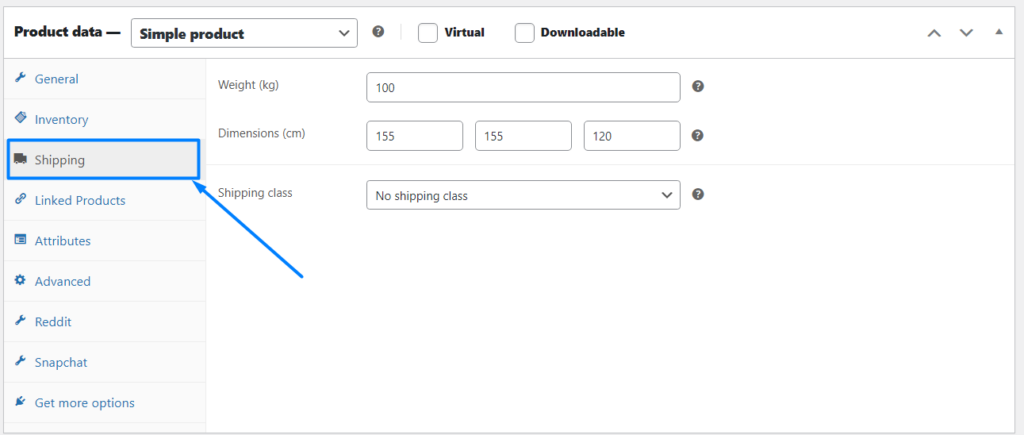
Here you need to fill the size for the product to ship according to specific class grouping based on the weight or size automatically.
You can fill details such as weight and dimensions to group items by weight for different shipping rates. Example, Items under 100 kg use one service; heavier ones require another. These help with shipping costs and customer information.
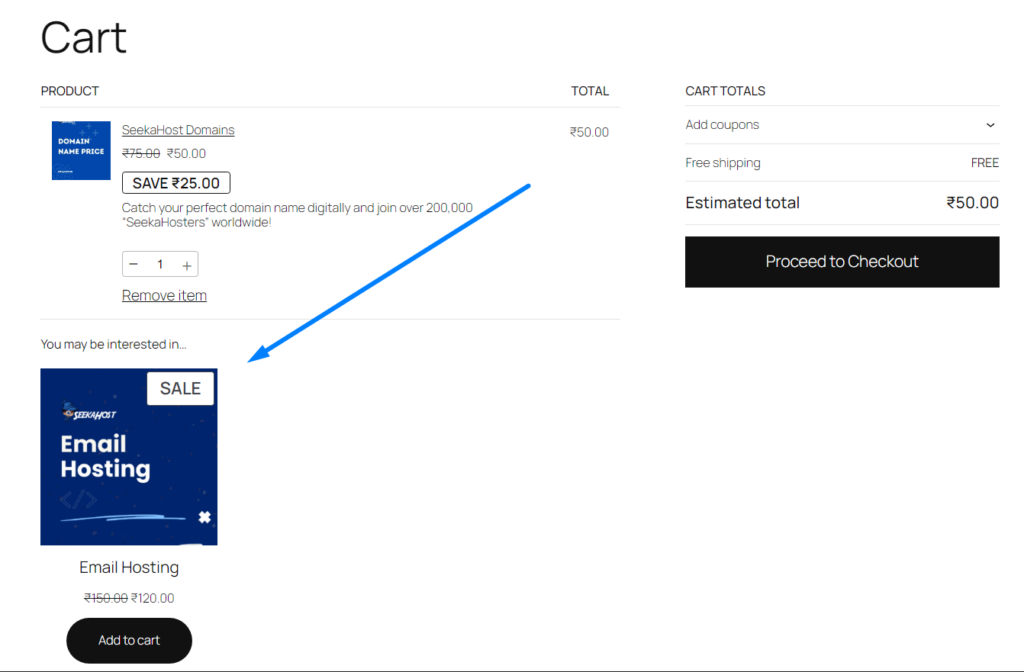
Linked Products:
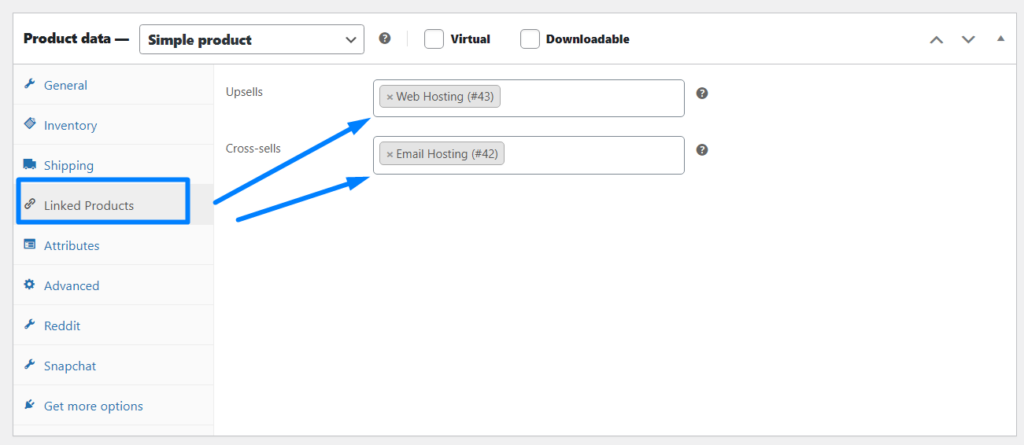
You can link certain products as recommended or suggesting products related to the products which user currently looking at.
Linked Products help you increase sales using two methods:
- Up-sells: Suggesting better versions or upgrades of the current item to increase the quality of the purchase.
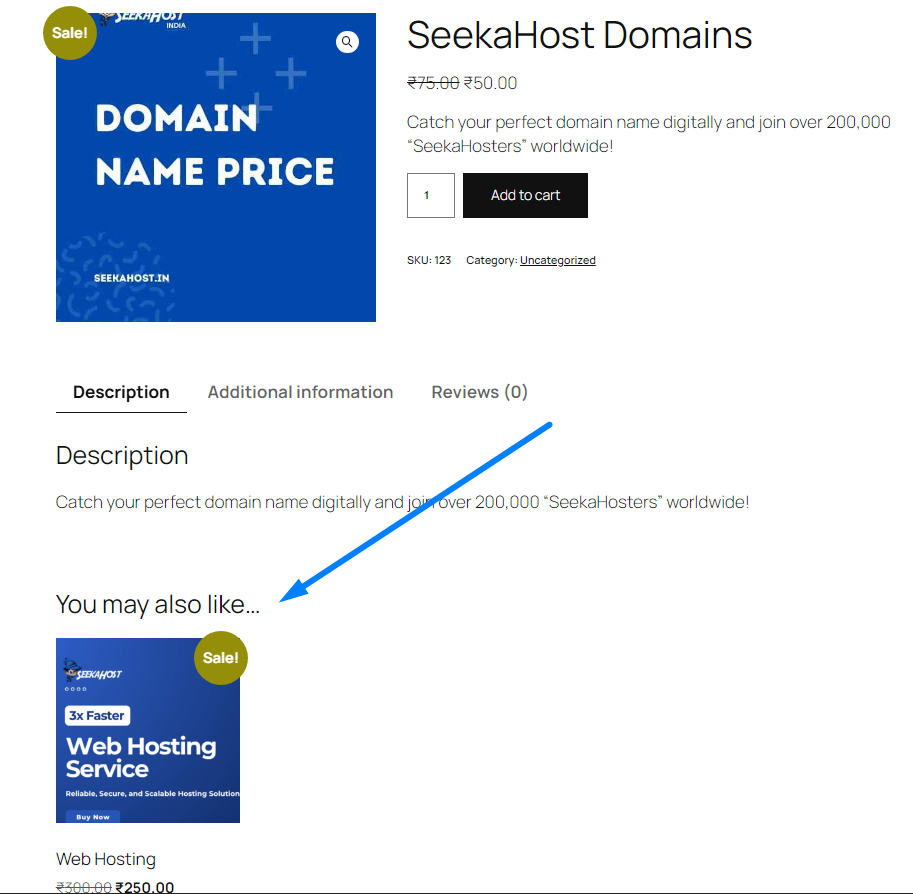
- Cross-sells: Suggesting complementary items in the cart to encourage extra purchases.
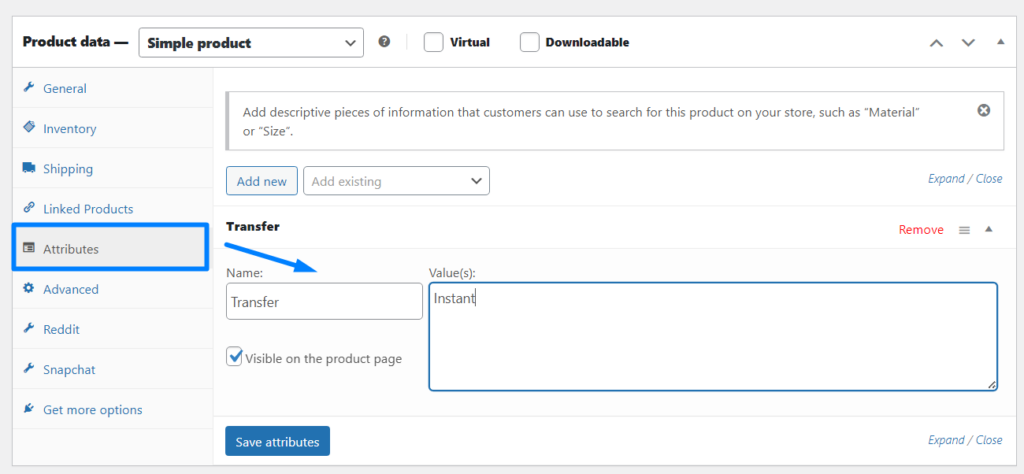
Attributes:
The Attributes tab lets you add custom details (like material or color) alongside standard info like size and weight. These appear on the product page to help customers understand specific features of it.
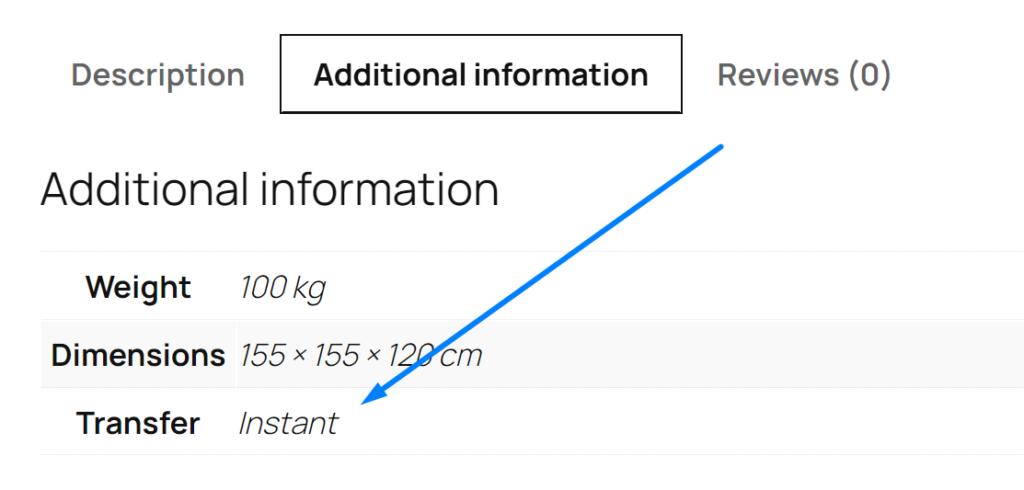
For example, I have updated the attribute as transfer with description as instant for SeekaHost Domains product.
Now this will be displayed under the additional information along with the information which you have updated as size, color, etc.
Advanced:
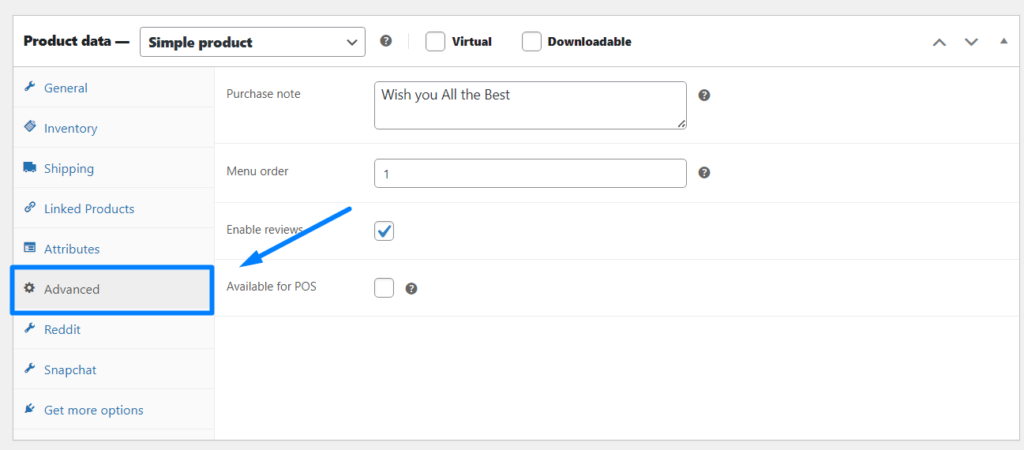
Its where you will customize on purchase of product. The Advanced section controls two key post-purchase features:
- Purchase Notes: Send a custom message or instructions to the customer once they buy.
- Reviews: Toggle customer feedback on or off for that specific product.
- Menu Order: Position the product how you want to list at which position.
- Available for POS: If the product is available for purchase on physical store, you can enable this option.
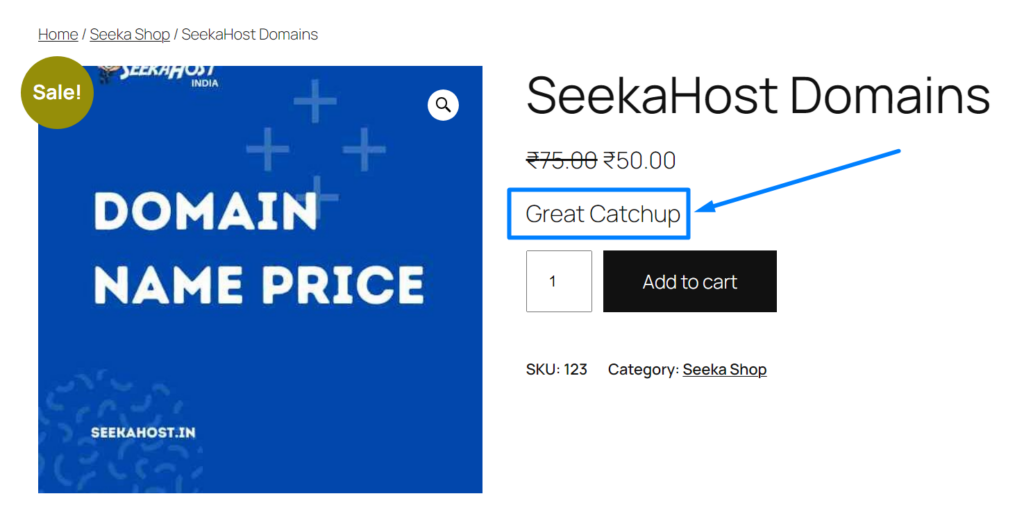
Step 5: For any catchy phrase or tagline relevant to the product, you can mention under the Product description.
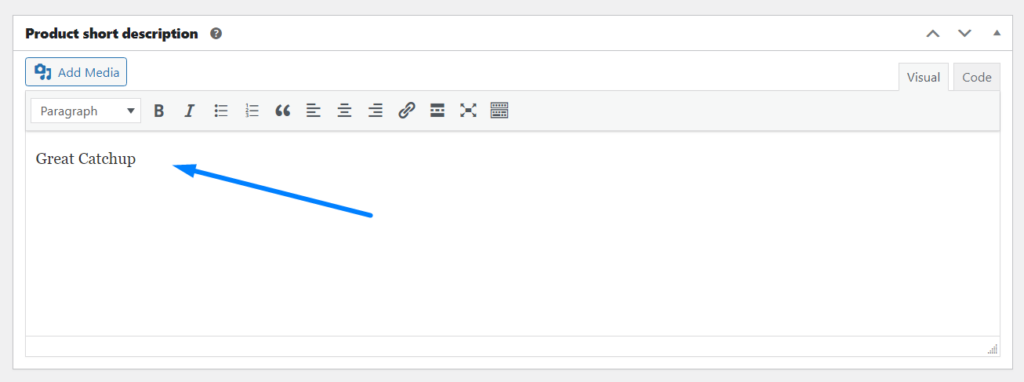
It will be displayed right below the product name which highlight the product more and give great value to it.
Step 6: Add Products in WooCommerce with Images for both product and gallery image for the specific product.
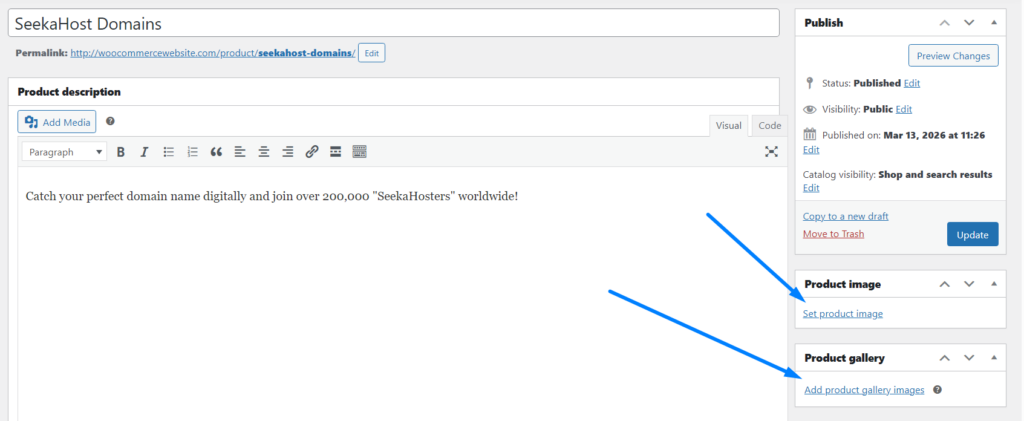
Once you have added the images, it will displayed on the product which you have added as feature image. Product image will be displayed as actual product feature image and gallery image will be displayed along with the feature image as an additional images for users to view of how the product looks in different views.
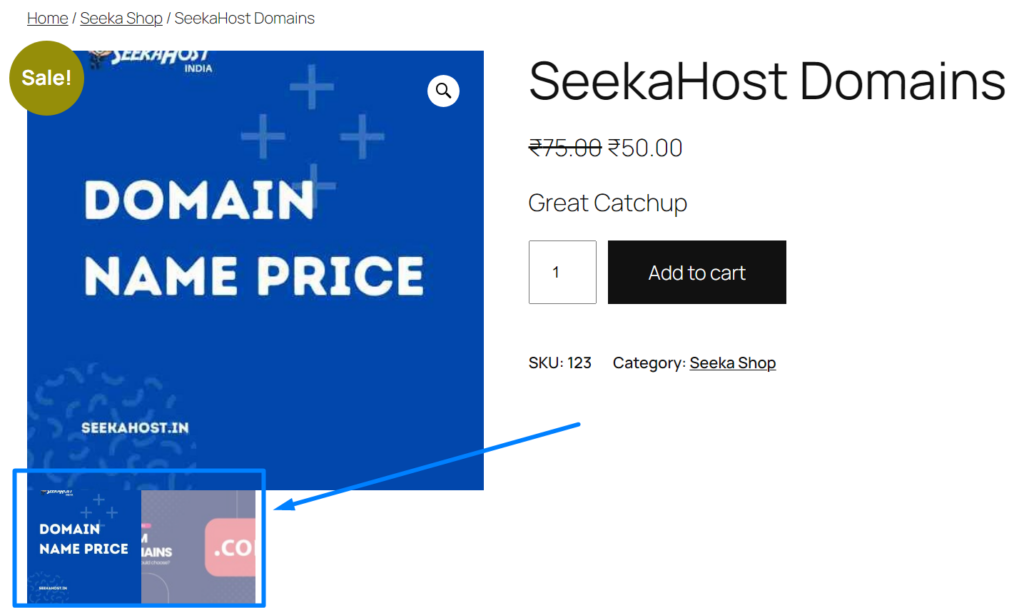
Step 7: On final step, you need to categories the product such as category, tags and brand names.
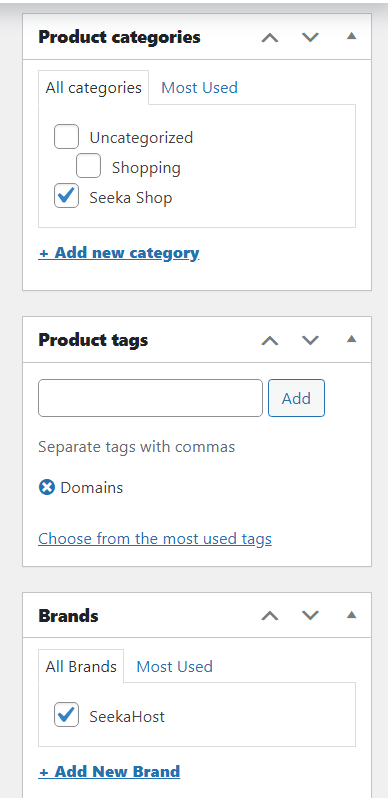
It will be displayed below the add to cart button for users to know under which section it comes so they can explore other products under the same section which boost the customer sales conversion a lot better.
That’s it. Once all set, after you Add Products in WooCommerce you can publish the product and it will become live for your customers to purchase the products all the time.