











Connect Domain to Wix in 2 Simple Methods

By Farhan Danish | August 6, 2026










Create a website using Wix and connect domain to Wix site with just following one of two methods possible. You can do this either via a nameserver change or domain DNS management.
Let’s check the two different methods available and how to successfully connect domain to Wix for free.
What is Wix?
Like other website builder platforms – Shopify, Weebly, WordPress, HubSpot, etc., Wix provides a free user-friendly website builder platform that helps users to design or create the website using their free template and built-in features. If you are a beginner or an individual who likes to start testing or wants to learn to build a website without much knowledge, then Wix is highly recommended without having a domain name registered.
If you want your site to have a professional look, better search engine ranking, SEO optimization, and more importantly to engage with live visitors to strengthen the brand and trust, having a domain registered would greatly help you.
Prerequisites:
1. Create a Website in Wix
2. Premium or paid Plan with Wix.
3. DNSSEC should not be enabled for the domain.
Connect Domain to Wix with Two Methods:
1. Connect with Wix Nameservers in Domain
2. Connect Domain to Wix through DNS Record in Domain
Before going into these two methods, we personally recommend going with the Second method if you are having any Email hosting records already updated in your domain DNS using domain default nameservers.
If not, then you can go with the first method which will be easier since Wix host your DNS.
1. Connect with Wix Nameservers
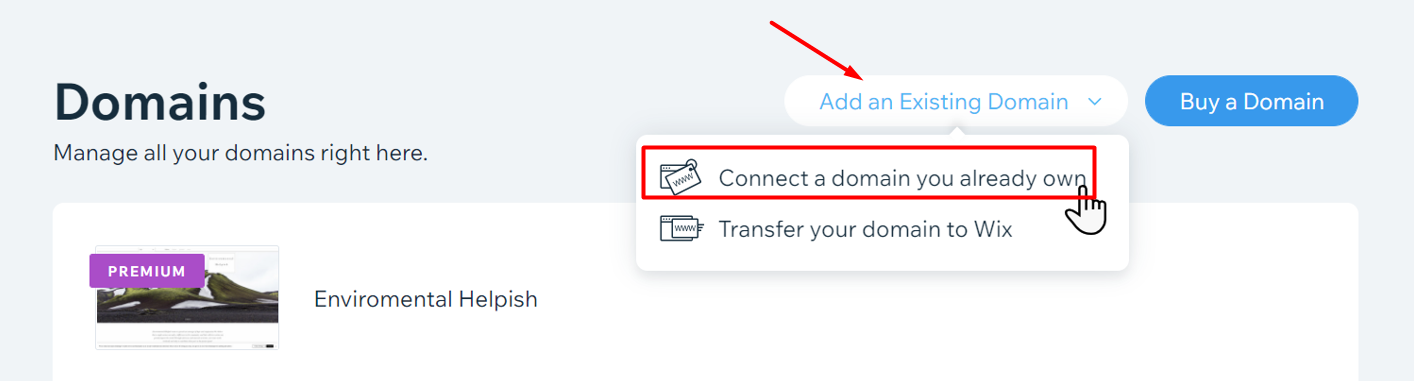
Step 1: Login to your Wix account -> Go to Domains section. Click “Add an Existing Domain” option -> choose “Connect a domain you already own”. Click found nameserver and copy the nameserver from there.
Step 2: Log in to your SeekaHost Client area.
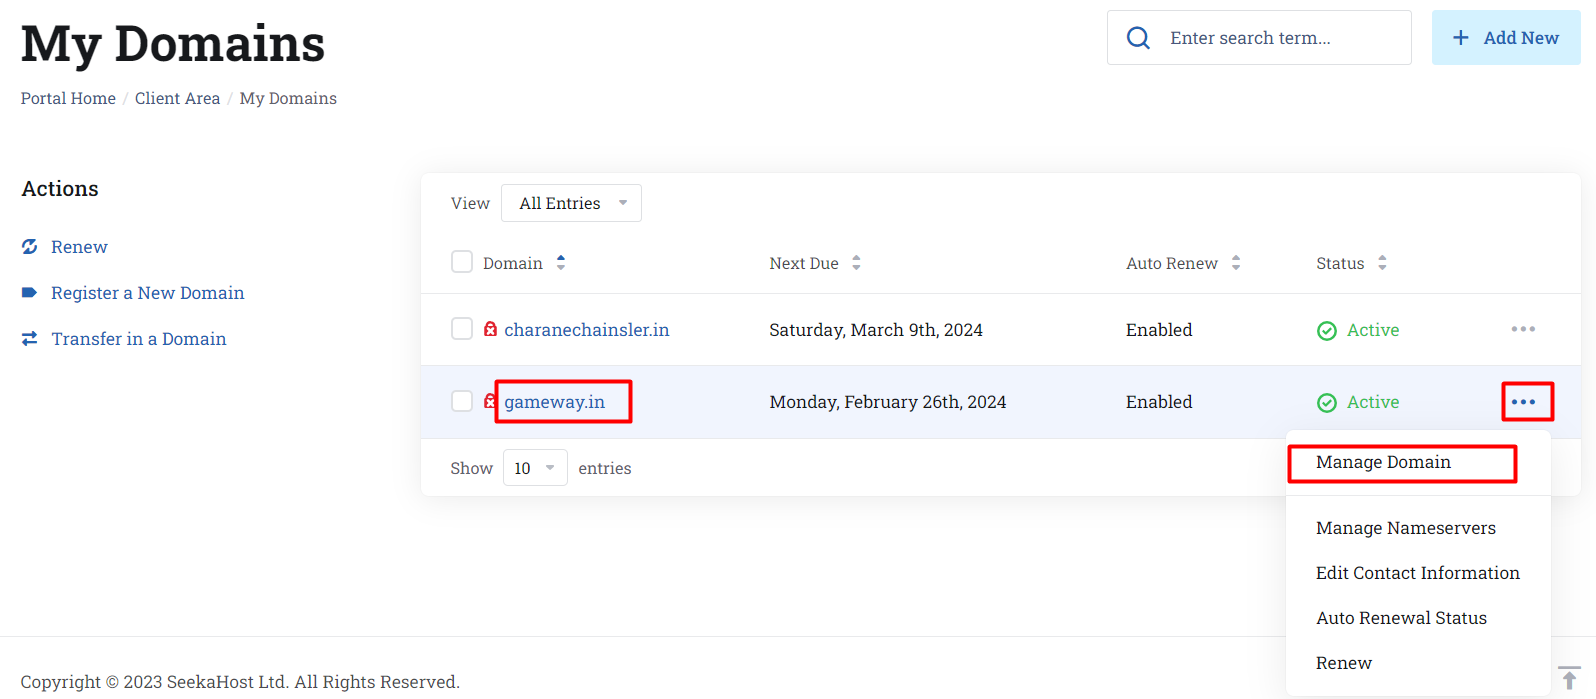
Step 3: Click the Domains section -> Manage button next to your domain name.
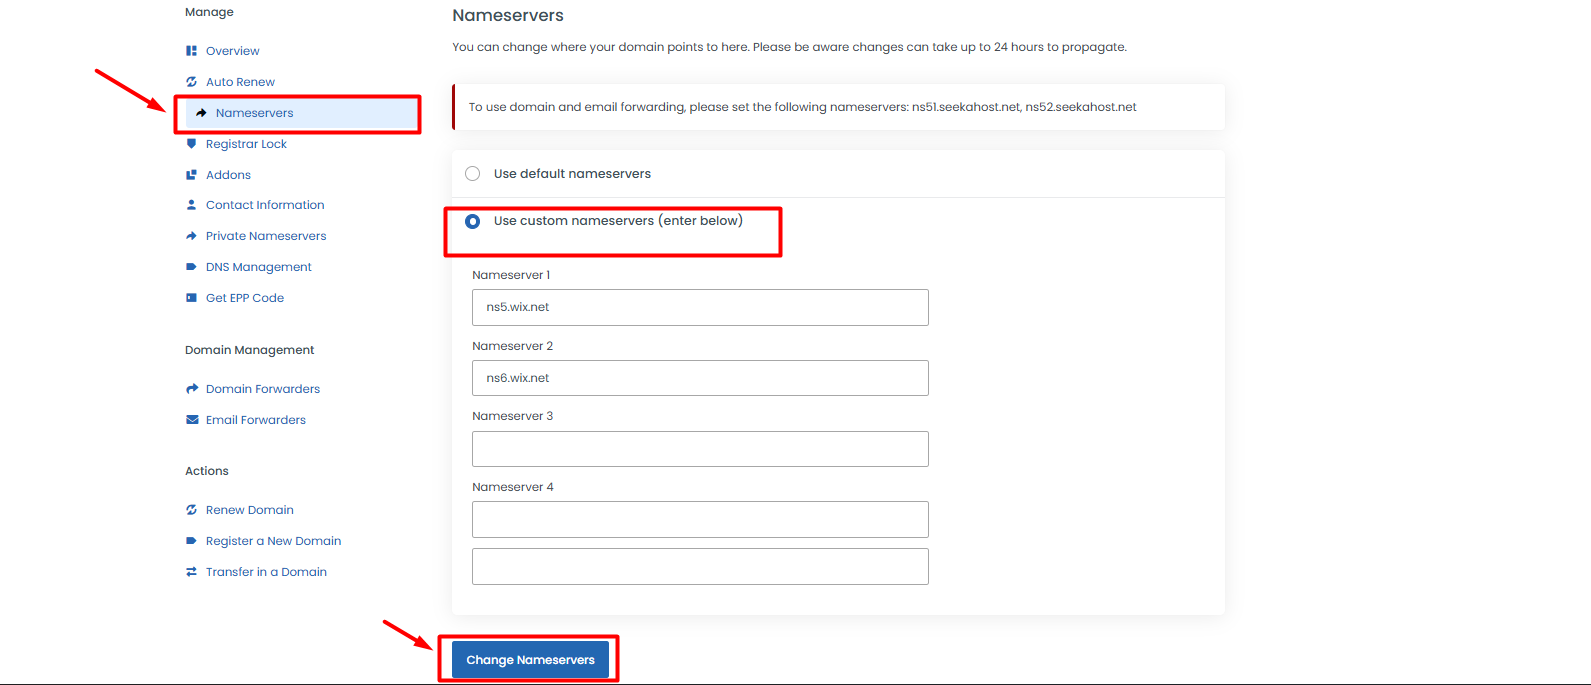
Step 4: Click “Nameserver” -> select the option “Use the custom nameserver” (enter the nameserver you see on your wix site) and click “Change nameserver’.
Now go to your Wix account to verify the connection. Wait for a maximum propagation time of 48 hours for the changes to take effect globally.
Note: If you have an email service and other DNS records, remember to update all records in Wix after changing your nameserver, as DNS management will transfer to Wix.
2. Connect with Wix DNS Record in Domain
Connect the domain in the Wix account to get the A Record and CNAME records from Wix and point in Domain DNS to Connect Domain to Wix.
Step 1: Follow the guide mentioned in step 2 and step 3 from above first method.
Step 2: Click ‘Nameserver’ on left side and confirm if you have updated the default nameserver of SeekaHost as below,
ns1.systemdns.com
ns2.systemdns.com
ns3.systemdns.com

Step 3: Click “DNS Management” on left side and select “A record” from the drop down and enter the details as follow,
Host Name: Leave it blank
Record Type: A (Address)
Address: Enter the Wix IP Address
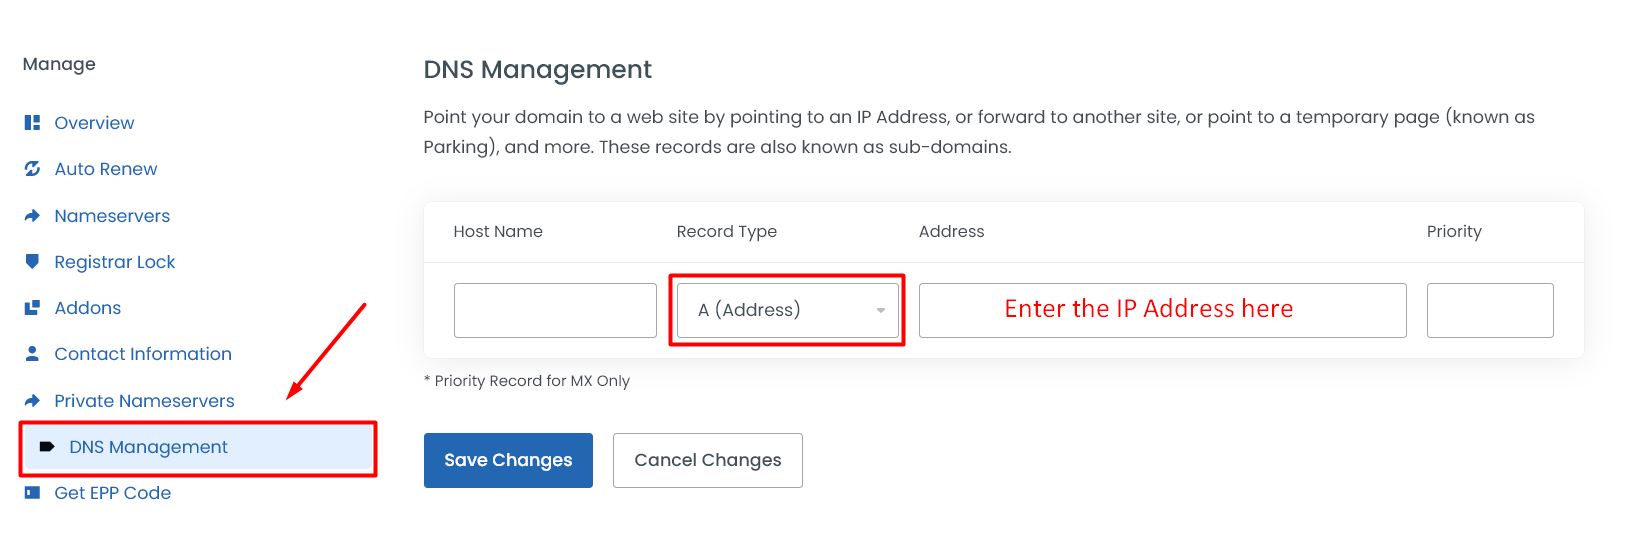
Click Save Changes.
Step 4: Again select “CNAME Record” from the drop down and enter the details as follow,
Host Name: www
Record Type: CNAME (Alias)
Address: Enter the WIX CNAME Record value
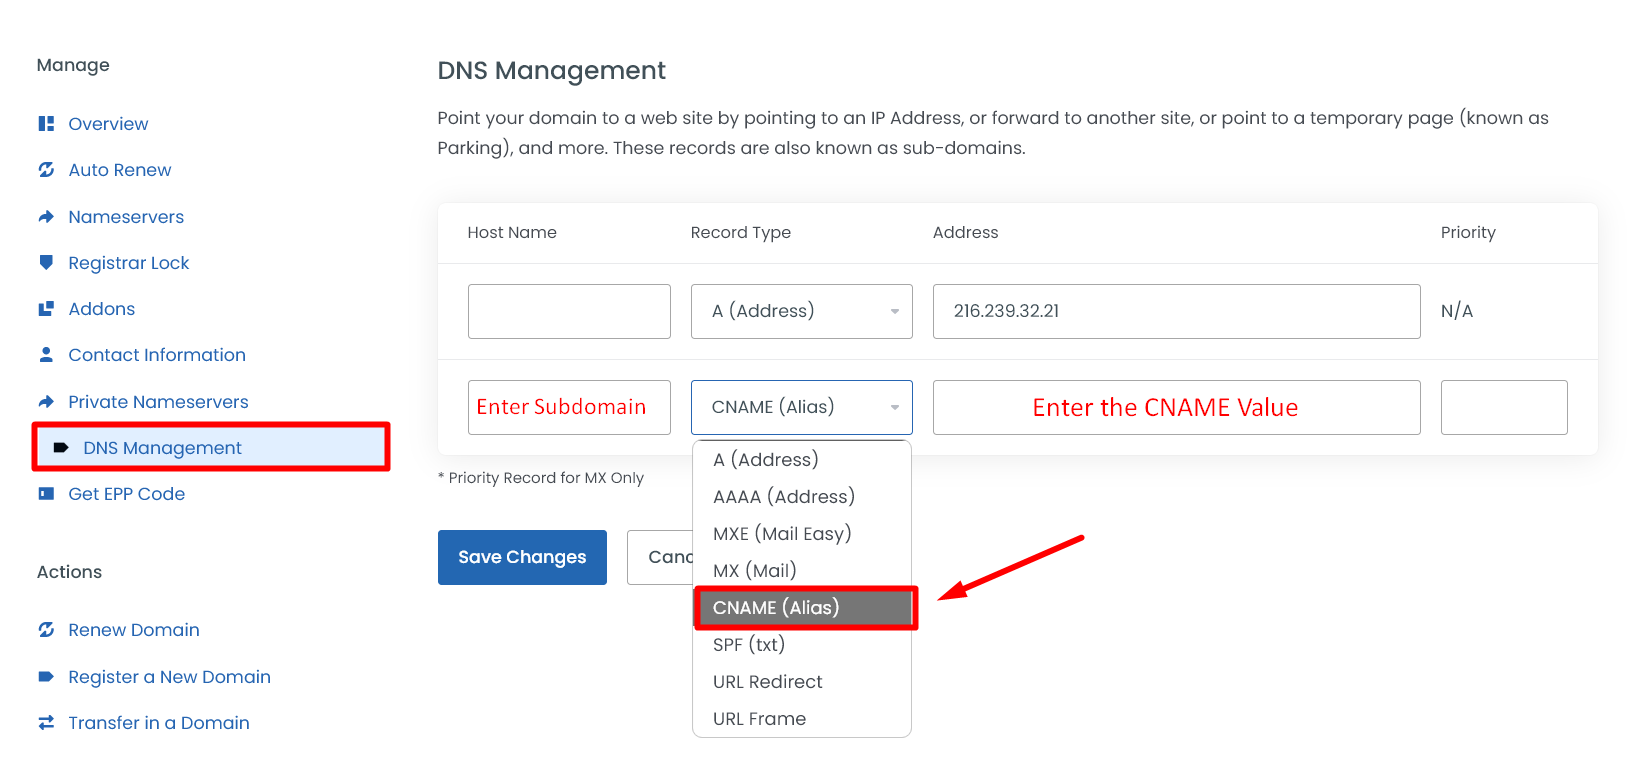
Then click Save Changes. You can also follow steps in the article – Update DNS records in domain if you want to update any other records along with Wix.
Now Go to your Wix account to complete the domain verification. It may take up to 48 hours for your domain’s new DNS records to propagate and your site to appear worldwide.
Hope this information and article helps you successfully to Connect Domain to Wix.