

How to Create Staging Site WordPress Using Softaculous in cPanel

By Arshath | July 18, 2026










Updating a live WordPress website without testing can sometimes result in broken layouts, plugin conflicts, or unexpected downtime. To avoid these issues, it is always recommended to Create Staging Site WordPress website to test the changes in a separate environment before applying them to your live site.
When you create staging site WordPress, you get an exact copy of your live website where you can safely test theme updates, plugin installations, custom code, and design changes without affecting visitors. Once everything has been verified, you can publish the tested changes to your live website with confidence.
This guide explains how to create staging site WordPress using Softaculous in cPanel. The method also allows you to keep one staging copy as a backup while using another staging environment for ongoing website development.
Steps to Create Staging Site WordPress:
For this tutorial, we’ll use a sample domain named asdf.co.uk. Replace it with your own domain while following the steps below.
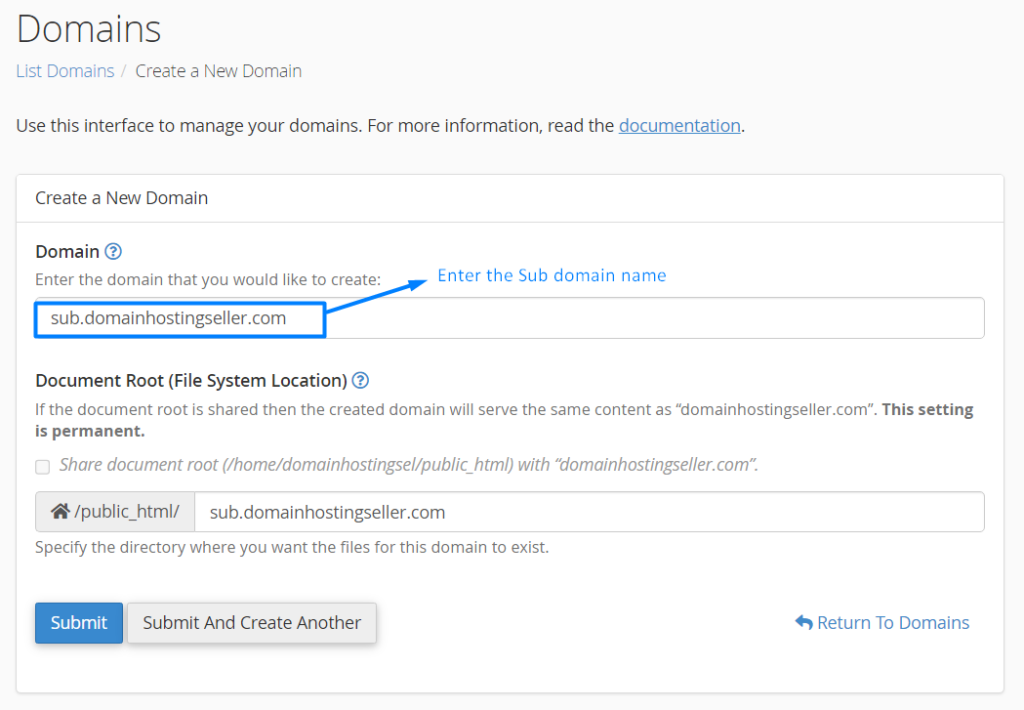
Step 1: Log in to cPanel and Create a Subdomain
Begin by logging in to your cPanel account and creating a new subdomain.
For example:
- Live Website: asdf.co.uk
- Backup Staging Site: sub.stagingsite.com
- Development Staging Site: staging.asdf.co.uk
In this setup, sub.staging.com acts as a backup copy of your live website. After creating it, avoid making any further changes to this staging site. Instead, use staging.asdf.co.uk for all development and testing activities.
Step 2: Open SeekaHost WordPress Manager
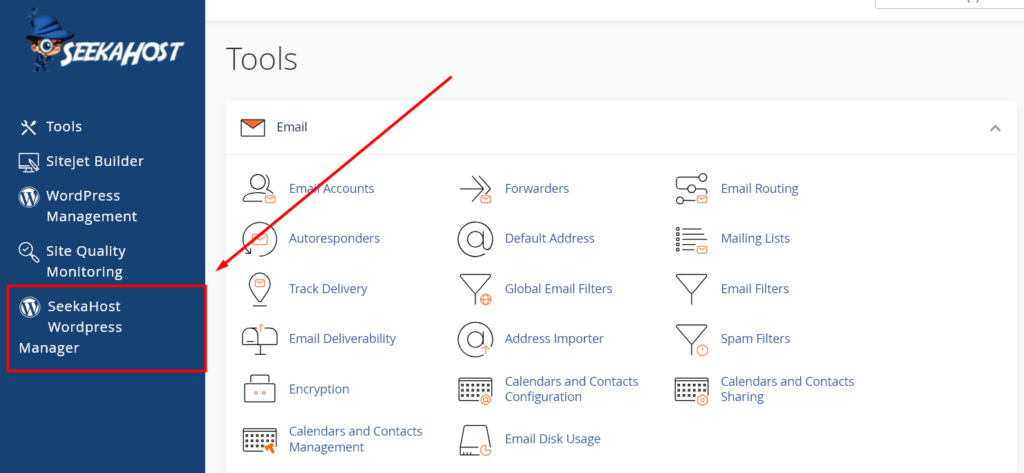
From the left-hand menu in cPanel, click SeekaHost WordPress Manager.
Step 3: View Your WordPress Installations
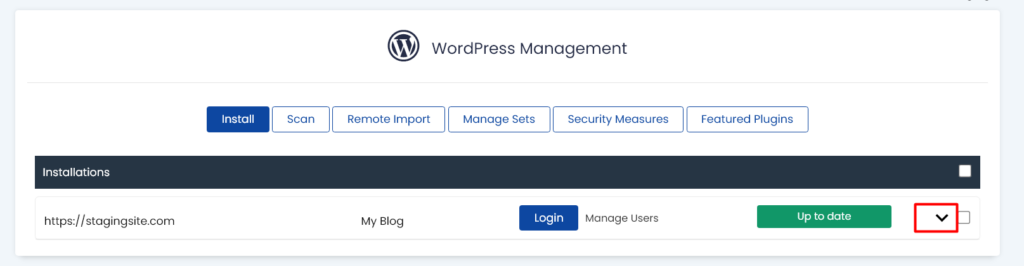
A list of all WordPress installations associated with your hosting account will appear.
Click the down arrow next to the website for which you want to Create Staging Site WordPress environment.
Step 4: Select the Staging Option
After expanding the installation details, click the Staging option for the selected website.

Step 5: Create the Staging Website
On the staging setup page:
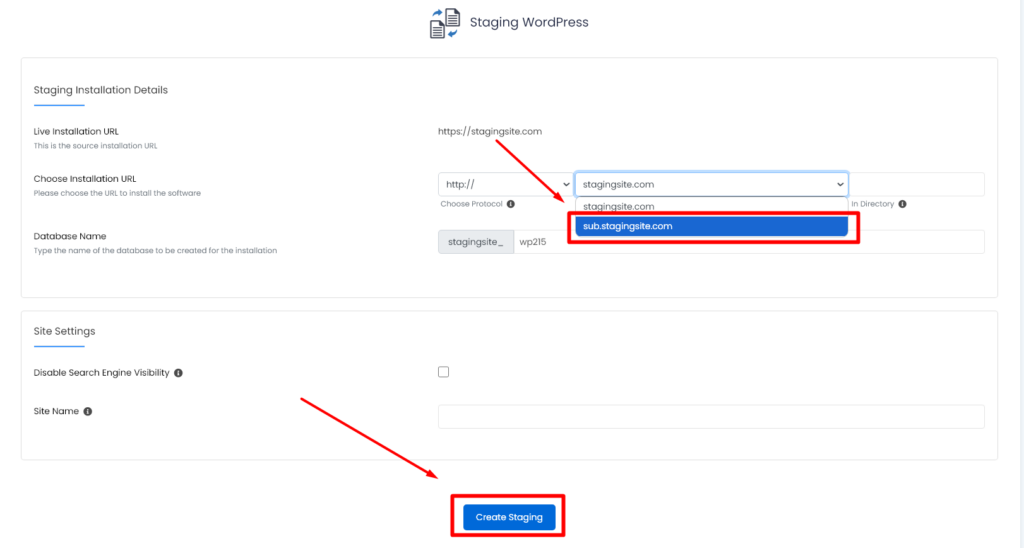
- Select your staging subdomain from the Choose Domain dropdown.
- Keep the Protocol the same as your live website.
- Leave the In Directory field empty.
- Click Create Staging.
This process will create staging site WordPress that mirrors your live website. As mentioned earlier, keep sub.staging.com as your untouched backup copy and perform all future development work on your dedicated staging website.
Step 6: Verify the Staging Site
Once the process is complete, you’ll see the message:
“Congratulations, the staging was created successfully.”
Click the WordPress Manager icon at the top of the page to return to the Script Installations section. Your newly created staging website will now appear in the list.

Step 7: Push the Staging Site to Live
After testing your website, click the down arrow beside your staging website (sub.staging.com) and select Push to Live.
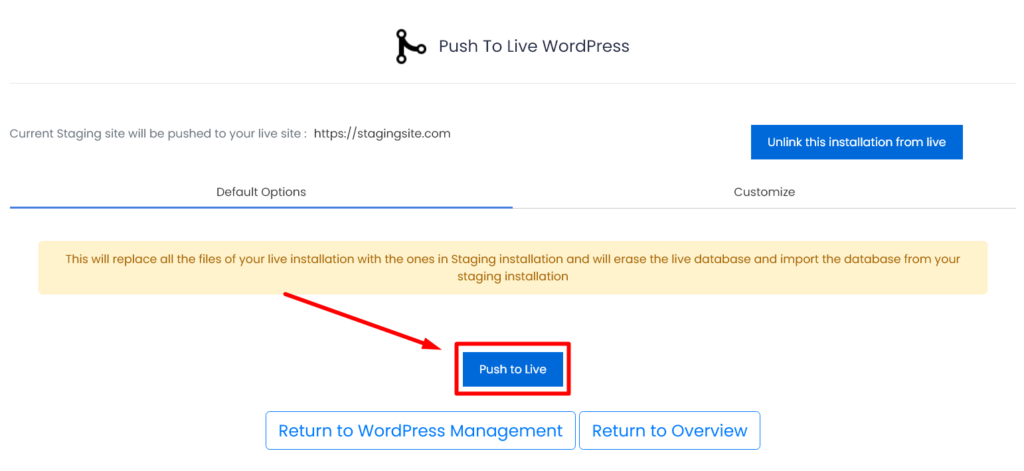
This option opens the deployment page, where you can replace your live website with the tested staging version.

Step 8: Publish Your Changes
Click Push to Live once again to begin updating your live website.
For example:
- Staging Website: sub.staging.com
- Live Website: https://stagingsite.com
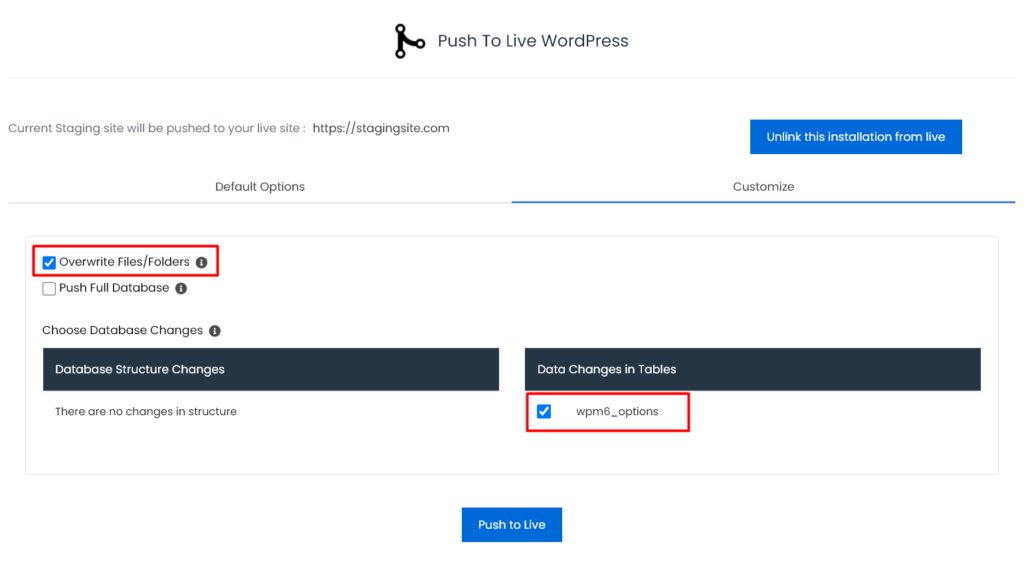
Softaculous also provides a Customize option, allowing you to choose whether to:
- Push both files and the database.
- Push only website files.
- Push only the database.
This flexibility is particularly useful when only certain parts of your website need to be updated.
If in case you have separate backup, you can revert back using that backup to your old version. Anyway, having a separate full backup of your website before processing everything for staging will be a safer move.
Why Create Staging Site WordPress?
A staging website helps you make changes with greater confidence by allowing you to test everything before it reaches your visitors. It is especially useful when:
- Updating WordPress core, themes, or plugins.
- Testing new features or custom code.
- Redesigning pages without affecting the live website.
- Identifying and fixing compatibility issues before deployment.
- Reducing the risk of downtime during website updates.
Best Practices Before Pushing Changes Live:
Even though Softaculous simplifies the staging process, creating a complete website backup before deploying any changes is always recommended.
Having a recent backup allows you to restore your website quickly if something doesn’t work as expected after the update.
Important Notes:
- Your WordPress administrator login credentials remain the same for both the live website and every staging website created through Softaculous.
- To prevent search engines from indexing your staging website, go to WordPress Dashboard -> Settings -> Reading and enable Discourage search engines from indexing this site.
- Test all plugins, themes, custom code, forms, and website functionality thoroughly before pushing changes to your live website.
- Keeping one staging copy as a backup while using another for development provides an additional layer of protection during major website updates.
Video Reference: